

I bought this truck Jan 20, 2011 from a guy in Queen Creek, AZ. He said he had bought it for his wife and then she didn't like it. He bought it from a guy in Sierra Vista who had let his daughter drive it on their 2-mile long driveway to the bus stop. Looking at the title I saw that it had not been registered since 2008.
The P.O. told me the following had been done to it recently (some by him, some by the owner before him:
- New GM crate motor
- The tranmission was rebuilt at the time of the new motor
- The front end bushings were all replaced
- New paint
- New fuel pump
So I started fixing stuff. This web page is my record of what I did to keep it running and hopefully improve it.
'92 Yukon Diary:
I did a bunch of stuff before I started keeping notes. Here is what I can remember
- New positive and negative battery cables
- New starter
- New alternator
- New washer reservoir cap
- New dash pad
- Storage box where stock stereo and equalizer went
- New front and rear speakers
- New AM/FM CD player
- New antenna
- New radiator
- New belts and hoses
- New belt tensioner (replaced under a highway overpass)
- New EGR vavle
- New EGR valve controller module
- All new vacuum lines
- 2 new thermostats
- New shocks all around
- New brakes all around
- New rotors in front
- Replaced distributor hold down bolt
- New distributor cap and rotor
- New MSD coil
- New Edelbrock intake
- Throttle body spacer
- Open element air cleaner
- Adjustable fuel pressure regulator
- Fuel pressure gauge
- Found that the cruise control will work if you pull up lightly on the brake pedal before engaging
- Windshield wiper arms and blades
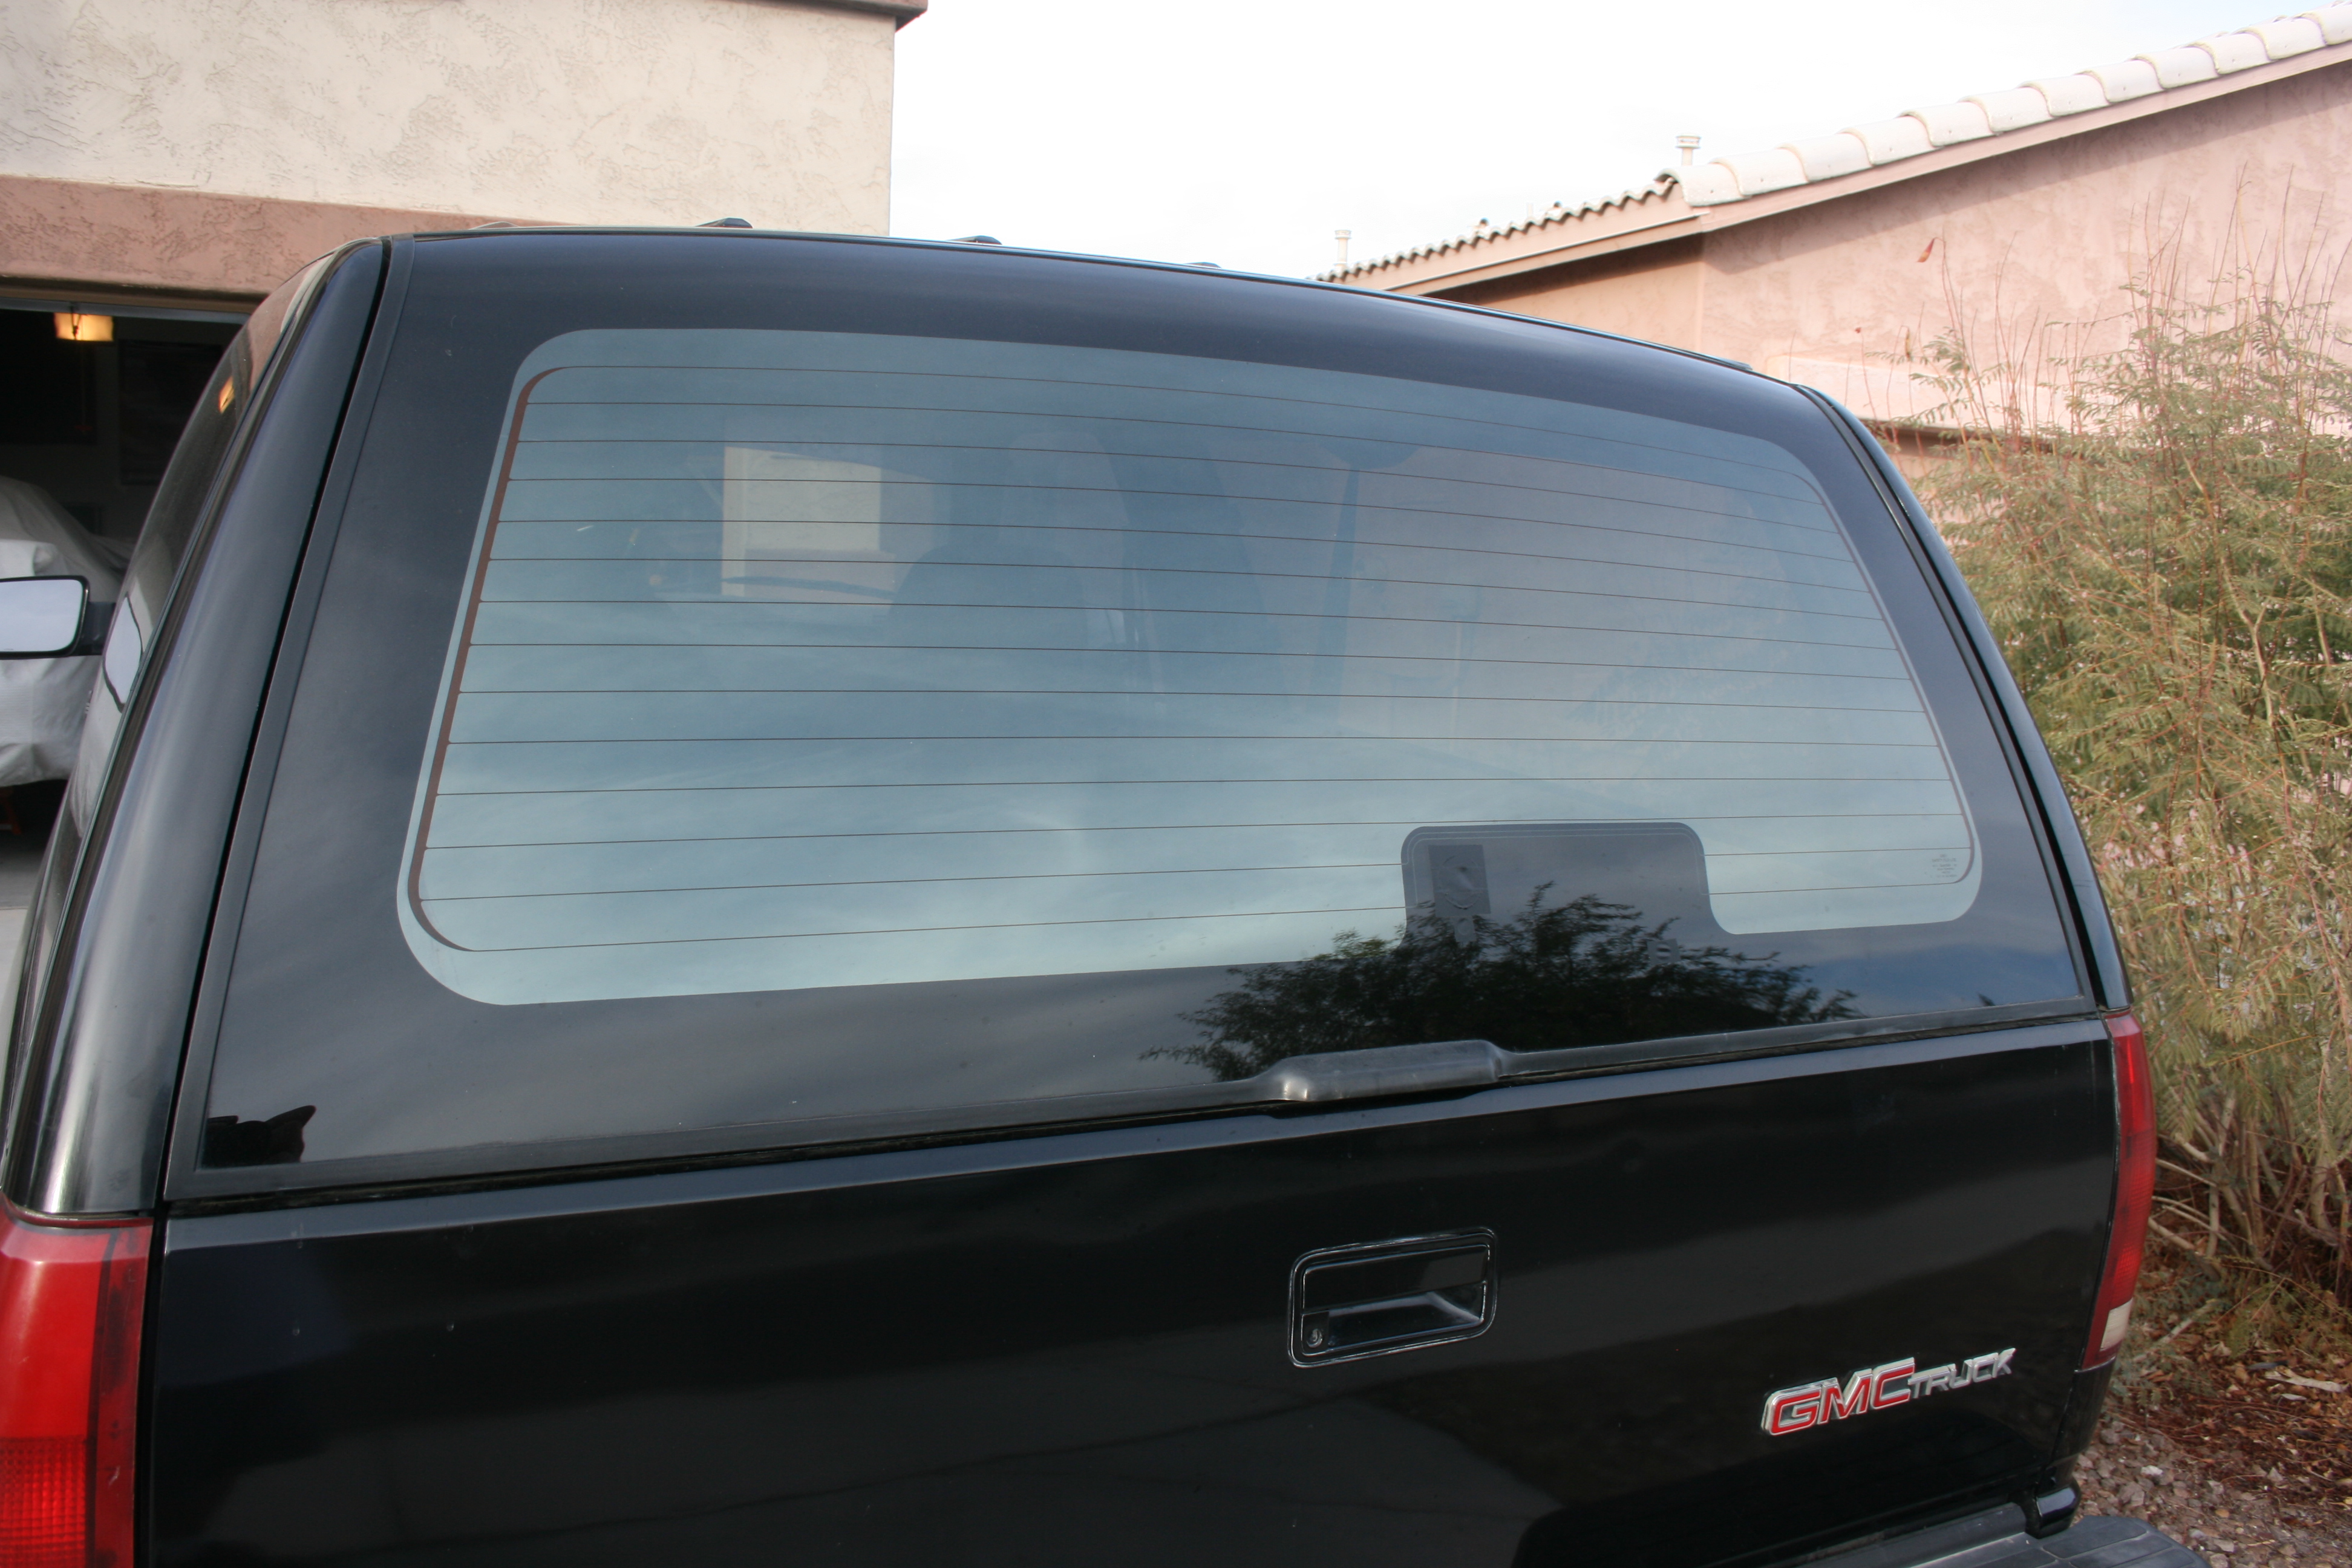
- Removed rear window wiper
- Remove roof rack
- Driver's side inside door handle broke, replaced
- Rebuilt rear differential Oct 15, 2011:
- Headers
- Edelbrock TBI intake
- Throttle body spacer
- Throttle body power plate
- Hypertech Salad bowl
- Adjustable fuel preassure regulator
- Fuel line adapter to add fuel pressure gauge
- 0-15 PSI fuelpressure gauge
- Open element air cleaner
- Adapter to convert 2 bolt air cleaner to 1 bolt
- 32: egr circuit fault --> not too worried about this
- electronic spark timing (EST) circuit grounded --> this one is troublesome :(
- Check that bypass connector is OK
- Replace plug wires (since I'm doing it anyway)
- Replace coil (since I'm doing it anyway)
- Check grounds to the engine (this is probably the issue)
- New ECM
- Check what codes I have now
- New oxygen sensor (picked one up and installed tonight)
- MAP sensor
- Thermostat
- Coolant temp sensor (engine will add more fuel if it thinks it is cool)
- Oil pressure sending unit (not emission related but gauge shows zero at idle after it warms up
- 12: System normal
- 32: EGR circuit fault
- 44: Oxygen sensor lean exhaust
- Fix oil pressure sending unit
- Install temp/compass rearviw mirror
- Install new A/C vents
- Fix antilock brake light
- Re-do and re-install headliner
- Re-install back panels
- Remove front driveshaft
- Get clutch pedal from a Chevy truck of about same year
- Swap 4L60e for T56
- See if any driveshafts I have will work.
- If not get a new made or make one of the old ones work
- Stock driveshaft for a 2-door 2WD Yukon/Tahoe should work
- Later, figure out how to ditch the front differential
- Get new wheels & tires
- Lower truck so wheels fill up wheel wells
- Remove running boards/nerf bars
- Remove fender flares
- Convert to 5-lug hubs
- Rear disk brake conversion
- T56 Conversion Reference Links
- Misc power, suspension, appearance links
- Newer Tahoe with nice wheels, tires, stance
- Ghost Ryder - Really nice 8-second street truck
- Pretty extreme truck build
- Another extreme truck buildup
- Yet another extreme truck buildup - built from several totaled trucks
- Syborg - Awesome Syclone
- Nice 454SS Build Thread
- Same nice 454SS Continued Build Thread - Like the stance and tires on this truck. Wheels, not so sure, but something for reference (Wheels: 17x8 Cragar 397's black, Tires: 275/55r17 Nitto nt450)
- Replace oil filter relocation hoses with braided hose and AN connectors
- Reposition seats
- Fix horn
- Install chrome valve covers
- Install headers
- Install braided brake lines
- ABS delete
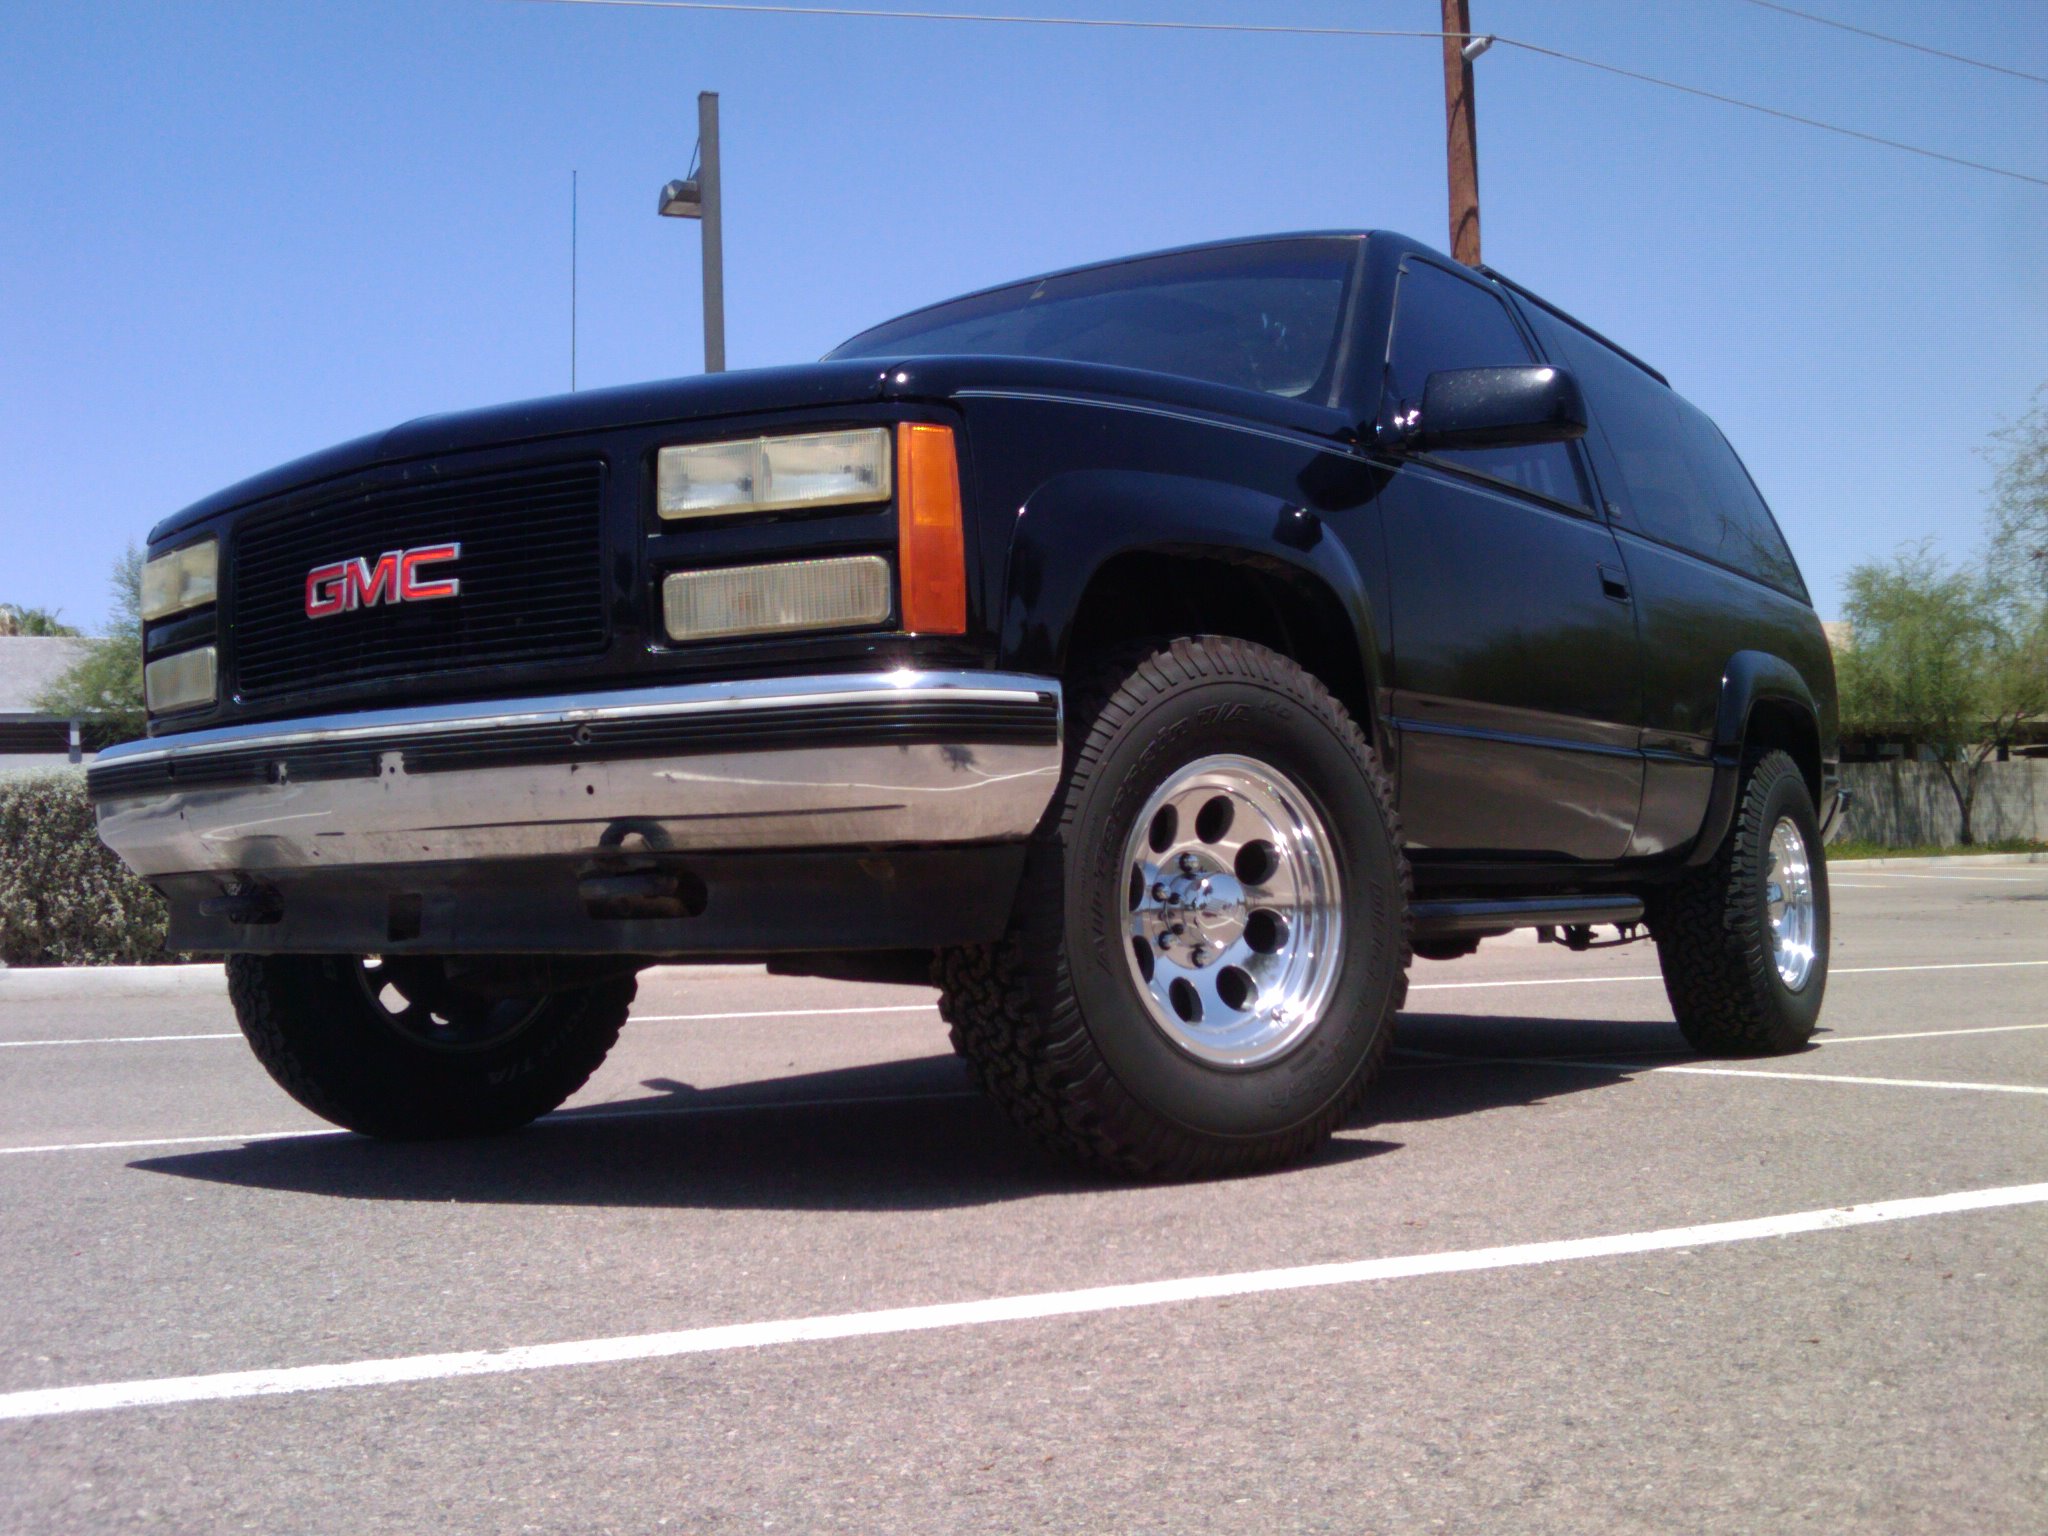
Yukon is running awesome. Did new wheels and tires awhile back. Here's a picture
|
Added new Mickey Thompson Classic IIs 16x8 6x5.5 lug spacing, 3-3/8\" backspacing (torqued to 100 lb-ft) along with BF Goodrich 265-75-r16 Tires

|
Have one leak on the truck which is not bad considering it is 20 years old. It is the right-front axle seal. It leaks a drop every few minutes or so. I bought the replacement seal from Napa for $9 but it is 100 degrees this weekend so will hold off until it is a little cooler. Here is a picture of where it is leaking from.
Nov 13, 2011:
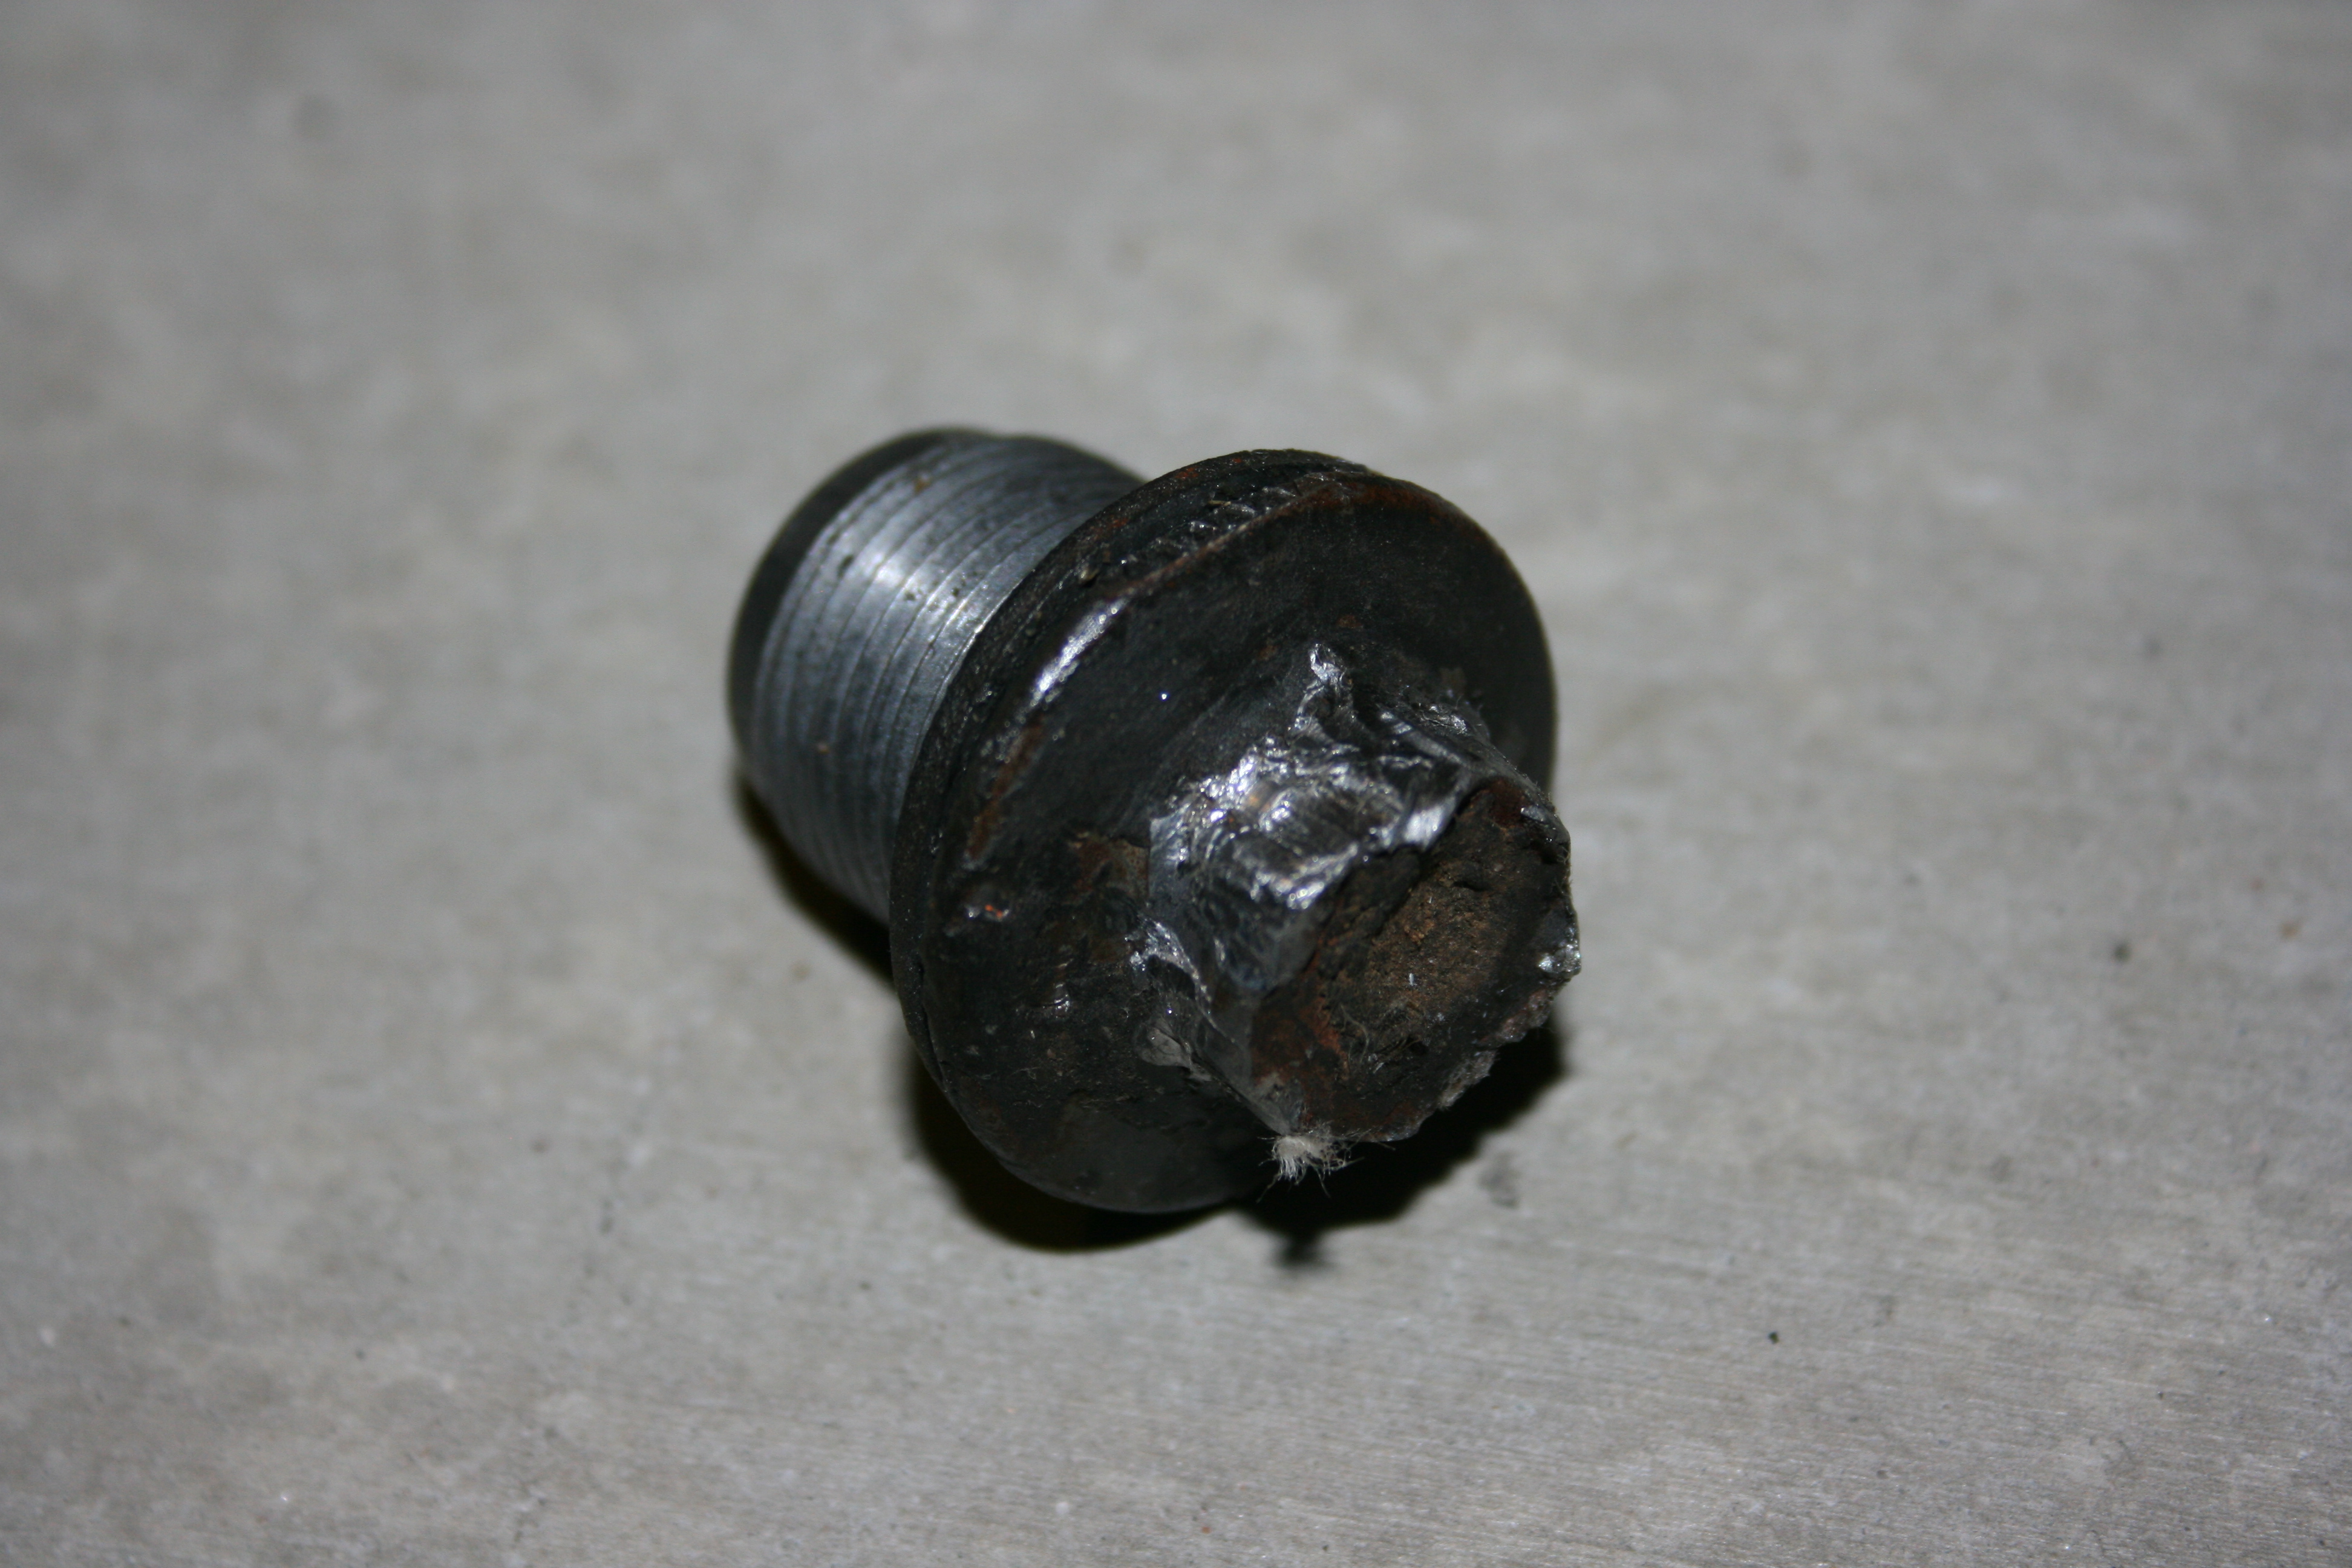
Today I spent the whole day pulling the front differential to replace a leaky seal. I ended up running out of time had to give up and it all back together so I can get to work tomorrow. I had it completely disconnected (4 bolts to frame (2 with bushings, 2 bolted directly to frame), 6 bolts to each CV joint, the universal joint, and 2 electrical connectors) and it was just balanced on the jack. In the end the only think I accomplished was stripping the fill hole bolt head (not good). The last time I topped it off (last weekend) I remember the fill plug was very tight. I obviously am over-tightening it. So now not only do I have a leak but I can't top it off. On the positive side I figured out the tricks to get all the bolts out so I could probably repeat in an hour or so.
I need to get a replacement fill plug. I am going to try pounding a 15mm socket on as far as possible and try to remove. If that doesn't work I will try vice grips. If that doesn't work I will have to try more drastic measures - perhaps removing the diff, taking apart the case, etc.
While I was under there I did do a front end lube job. Everything seemed pretty dry.
Nov 18, 2011:
Today I noticed the leak seems to be worse.
|
I was finally able to get the front differential fill plug out. I hammeered on a 15mm socket (the correct size) but it just spun. I then hammered on a 9/16" socket and was able to break loose and remove the plug. I picked up a new fill plug from a dealer this past week with the plastic gasket ($30 ouch) and installed it after topping off the oil again. Lesson learned.
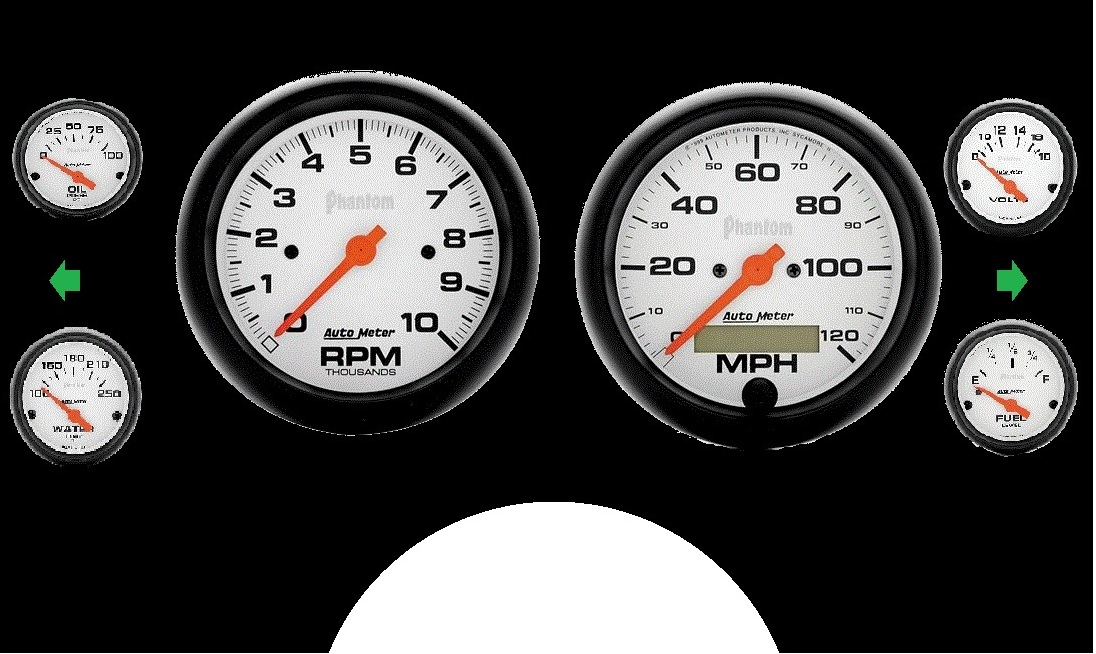
Dec 10, 2011: I don't liked the Yukon's gauge cluster. Also, I don't understand why there is not a tach. I'm considering fabbing up my own replacement cluster. I took some measurements and looked up online what size aftermarket gauges are. The large gauges are 5" and the small gauges are 2-1/16". I drew a mockup up in MS paint to scale to see if all of the gauges would fit.

|
|
Stock gauges and mock-up of aftermarket gauges in fabricated gauge cluster. The back would be aluminum (not sure about the thicknesss). Not sure how to cut out the turnsignal lights. This would not be cheap though. At Summit these 6 gauges go for $517! I think I might go for black gauges with with digits.
Fabbing up the gauge cluster and installation does not seem that difficult. Lay out the placement on a 3/16" (approx) thick aluminum sheetand cut the holes with a 5" and 2-1/16" hole saws. Could re-use the gear selector marker or maybe just eliminate it, turn signals would have to be cut out in the shape of the right and left arrows. Might consider having a machine shop cut all the holes. Then could powder coat or paint black the sheet and mount the gauges. The electrical or mechanical would mostly just splice into the original connectors but there is the possibility that some may be different. Could go completely syandalone gauges with new sending units, etc which would be the most accurate (i.e. I don't think my current volt or temp gauges are close to correct). With these gauges I would give up trip odometer which I do use (maybe there is a trip odometer on these gauges?).
Dec 18, 2011: Update: think I was off on my scale. Need to re-do the drawing. Not sure that everything will fit :(
I would like to also at some point swap out the light switches, heat/AC controls for more modern, better functioning switches.
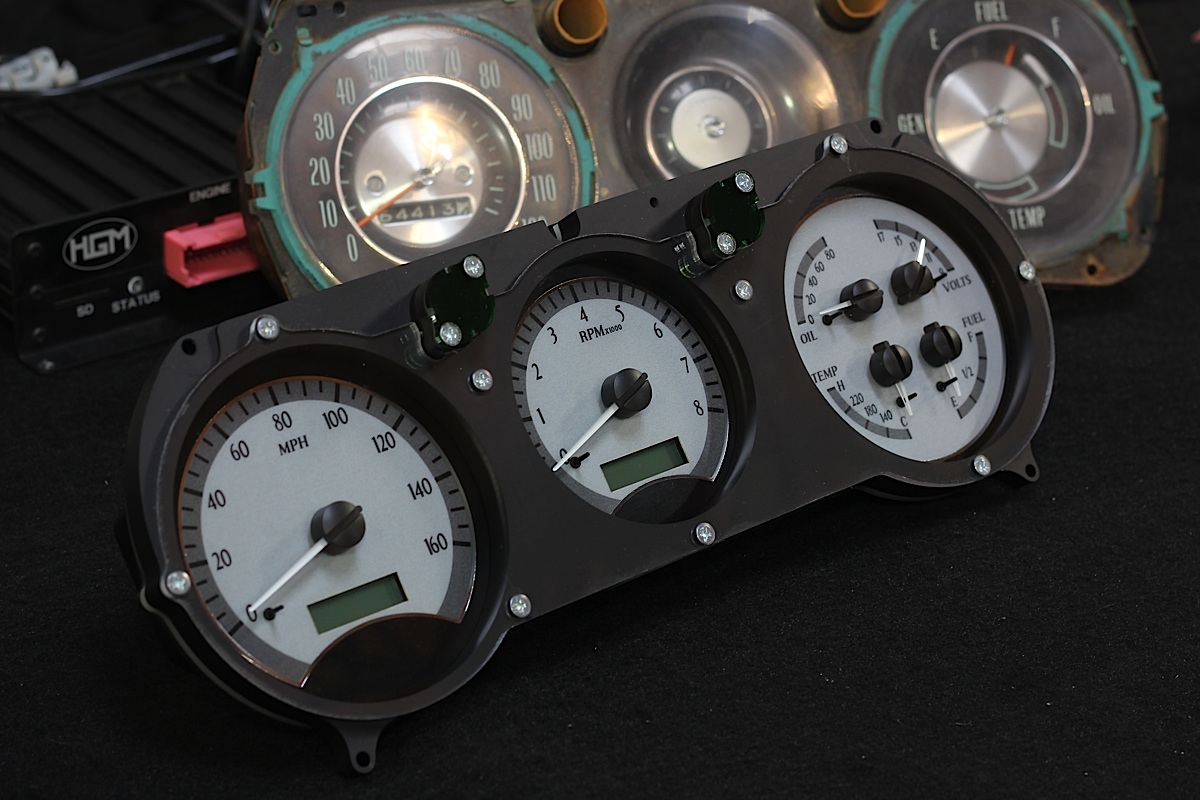
Another update: Need to check out this article.
Cool gauge cluster from the article.
Dec 11, 2011:
|
Removed the rear wiper and roof rack. Also painted the front wiper arms and touched up a few scratches.
Dec 13, 2011:

|
Grenaded the rear on the way to work today. Had it towed to a trans shop. They are rebuilding the rear. I'm in a rental car for the time being.
Dec 18, 2011: I still don't have the Yukon back. I broke down 40 miles from home or I would have had it towed home and fixed it myself. I could have even swapped the rear from the Burbn for almost no cost and not too hard. Since I was so far from home I kind of panicked and had it towed to a shop I found via google on my phone. They had high ratings there. I have had 5 days (so far) in a rental car and these guys are charging a fortune. It better be right (Yeah right. What can I really do besides take it back and let them try again). I will write up a full review on the shop after I get my vehicle back.
Dec 21, 2011: Ordered some parts for Christmas. Ordered the headers from ebay and everything else from Summit Racing and CFM-Tech
Going to have to fab up a y-pipe. Would like to see what I can do myself and just take the pieces in to be welded up. Or may just take it to an exhause shop and have them make me a y-pipe. I wonder who I should take it to?
July 22, 2012:
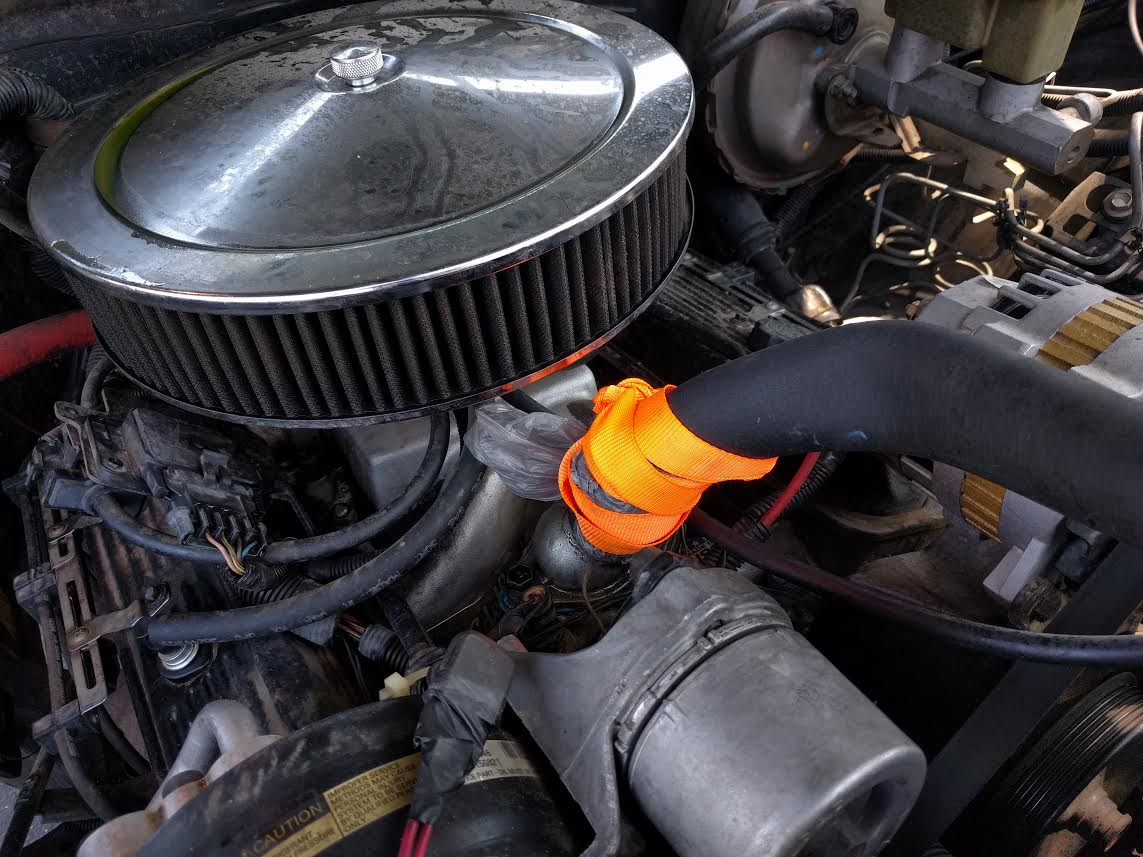
Truck started stumbling and surging badly on one of our 115 degree days in rush hour traffic. truck would only go about 30 mph and would die everytime I stopped. This was fun in bumper-to-bumper traffic. Finally got it home and figured out the right side (passenger side) injector was not spraying. That was probably a 30 minute job to fix but since I was in there I decided to do the long overdue install of my Christmas present Edelbrock intake, adjustable fuel pressure regulator, fuel pressure gauge, throttle body spacer, and throttle body power plate. I had a fuel leak at first but that is fixed now. I am still having trouble getting the fuel pressure adjusted. I cannot get my fat fingers on that adjusting knob to turn it. Right now the fuel pressure is at about 13.5psi. I would like to get it to 14.5-15psi. I've read online that there is a allen head screw under that plastic knob. That would be easier since I could probably get an allen wrench on it to make the adjustments. I'm not sure I have the timing quite right either. Right now I have the timing about 4 degrees advanced. Maybe I should go with 6-8 degrees... Running pretty good but I'm not sure it is better or even as good as before all of these mods.
Right front brake started grinding badly this week. I've also always had an issue with the truck diving badly to the left and nose down during hard braking. Inside right-side brake pad was completely down to the metal and had gouged the rotor pretty badly. Took the rotors to O'Reilly (called Autozone first but the girl on the phone said no Autozone turns rotors) to be turned and the left side one was barely within spec and the right one would be out of spec after turning. The The O'Reilly counter checked to see if they had any in stock and they had 2 for $20 each. Since turning the old ones cost $15 I went ahead and got 2 new rotors. Install went OK and I was sure to grease up the metal on metal contact points and the pins really well. Also adjusted the rear brakes.
Also rotated the tires RF-->LR, LF-->RR, and adjusted the rear brakes
July 24, 2012: Checked the error codes in the computer. Have 2 errors:
Found some info. Still trying to debug this
July 28, 2012: Things to try to clean up this code 42 - EST circuit grounded:
July 29, 2012:
Installed new MSD Street Fire coil last night. I also painted the coil mounting bracket and distributor hold down with metallic silver paint. Looks just like the aluminum intake but I'm not sure how long it will stay looking good. I may try painting the thermostat housing next. I also checked out the wiring behiond the wiring block and din't see anything obvious why I would be getting error code 42.
While messing around under the hood I found another EGR connector wiring hanging down. Not sure why I have 2. They have the same wire colors, the same connector, and both look like they should plug in about there... Tried plugging the other one in to see if it makes any difference. I remember now that nothing was plugged in to the EGR control solenoid when I got it. Seems to run the same with the other EGR connector plugged in. I need to figure this out.
I adjusted the timing again. It is really hard to see the timing tab but I think it it advanced about 8 degrees now. Runs much better. Still getting a Check Engine Light but I haven't read out the codes again yet.
Aug 11, 2012:
Yesterday on the way home from work, the truck started backfiring out of nowhere. It was doing it while accelerating. It was about 112 degrees at the time so that was my first thought. It sounded like it was backfiring through the exhaust and did it for about a mile. It stopped then but I was driving it much easier. I did a little research online and it may be a bad ignition module which might explain the error code #42 (EST circuit grounded) which I still have.
Aug 12, 2012:
Took the ignition module in to Autozone. They tested it 10 times and it passed every time. I don't trust it and I really suspect that at least some of my issues. I've read online several places that those things tend to fail quite a bit so I went ahead and go a new one and installed it. I will report back if I have any issues and if my error code #42 goes away.
Aug 21, 2012:
No more backfiring and surging. Error codes are still there. Over the weekend I cleaned up the chassis grounds. The battery cable ground and the strap that goes from the block to the frame. I sanded down the frame to make sure I was getting a good connection. Yesterday was, I think, the first day I drove to work and back without a check engine light. Keeping my fingers crossed.
Last night I noticed the master cylinder reservoir was low. I think I may have a leak out of the lid. Cleaned out the brake fluid and refilled it. Need to keep an eye on this.
Sept 10, 2012:
Noticed the truck didn't seem to be shifting right the other day. Kind of slipping. Got home and checked the trans fluid. Very low, not even showing on the dip stick. Topped it off then I noticed that there was an oil stain under the truck. Geuss I have a new leak. Haven't figured out where the leak is yet.
Sept 15, 2012:
No more sign of the trans leak. That was weird. Keeping an eye on it.
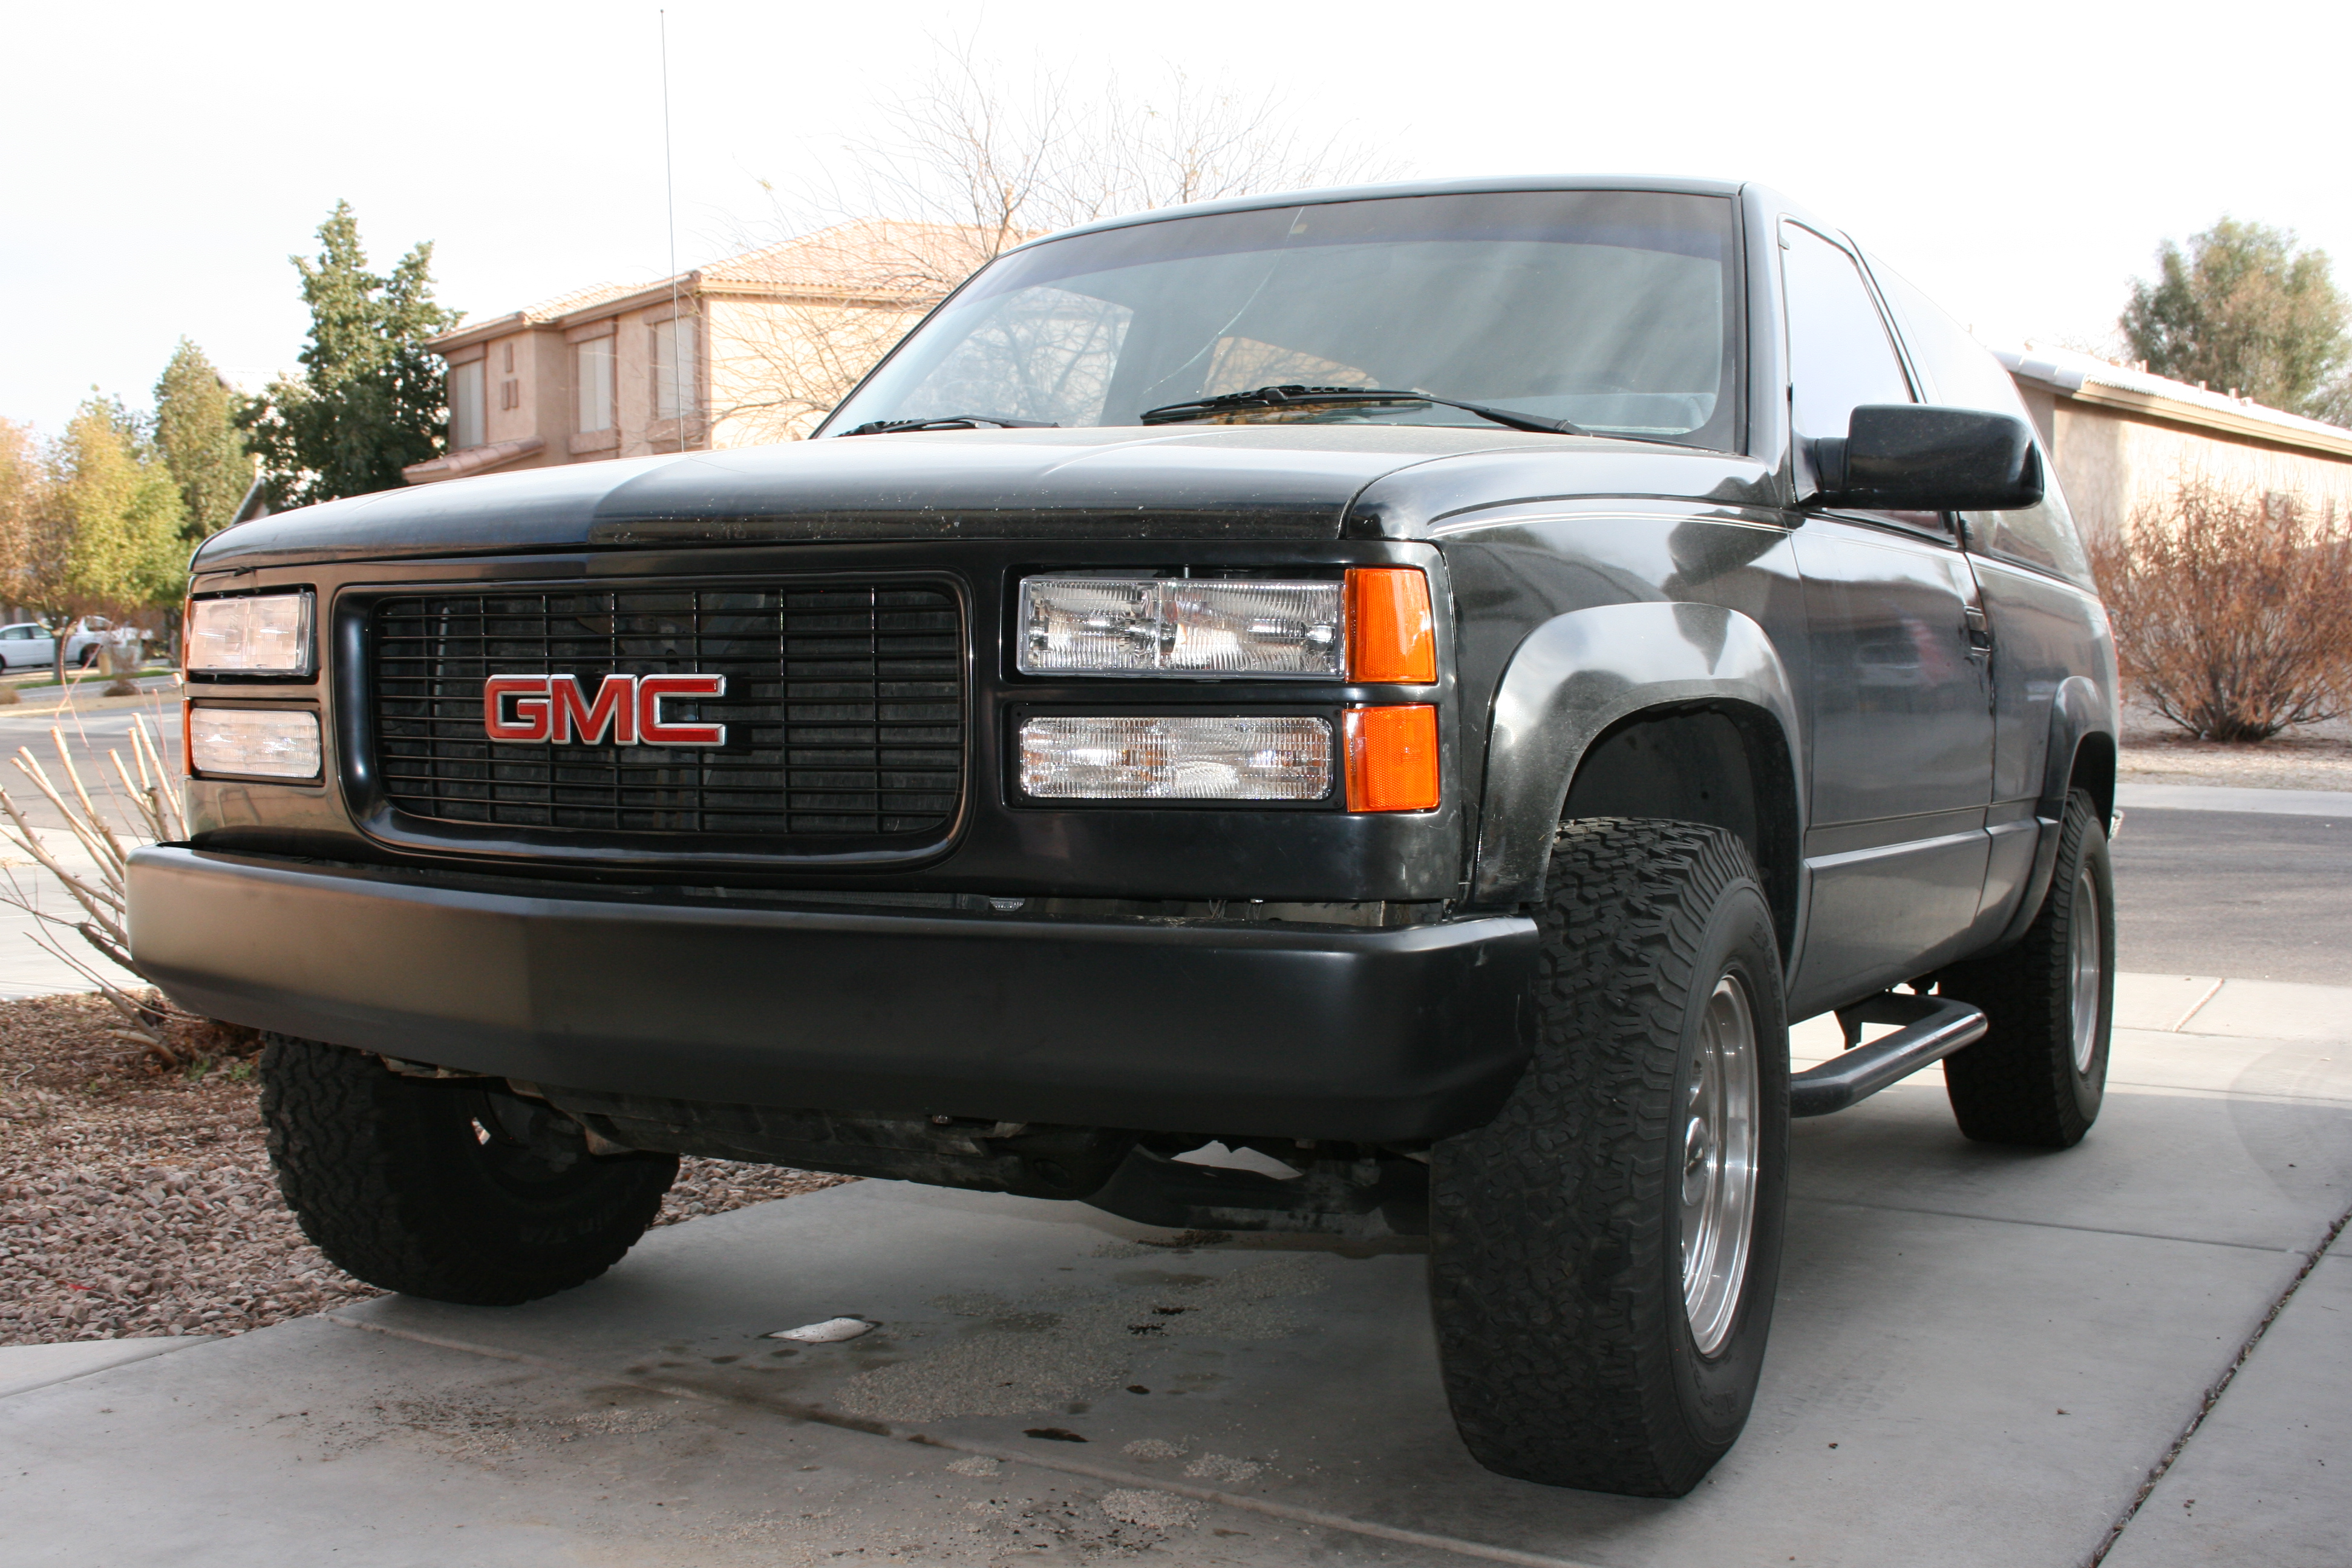
Last week I drove to work in a pretty heavy rainstorm. I was going about 70MPH down the freeway for a few miles. When I got to work I noticed that the paint blew off the front endge of the hood and grill. Last weekend I had used touch-up paint to touch up a few small, normal chips from daily driving the thing. No sign of any issues. I have no idea why this suddenly happened. The grill is not that big of a deal since I was planning on swapping in a '94-up grill ( parts list). I have always thought about swapping in a cowl hood but that was lower priority since my stock hood was pretty good (not perfect though) but if I'm paying to paint something I will probably go ahead and get the new hood (about $400 from LMC Trucks). Here's some pics of the new look (WIP)

Feb 19, 2013: My wife bought me new grill, headlights, smooth front bumper, front turn signals, and markers for Christmas from LMC Truck. I ordered the 94-up grill because I think it looks much nicer. Work has been so crazy that I just got around to installing everything yesterday. I found that I am missing the 3-piece bumper filler. I still have to take everything back off to have it painted. I thought that I could re-use my old one but I couldn't make it fit and I now see that the 94-up one is completely different. I'm not real happy with the fit of the after market grill that I got but I am hoping that I can get it to fit well enough with a little more coaxing.

|
|
Before and after pictures of the front end upgrade. On the left is the stock 92 grill with cloudy headlights. On the right is the aftermarket 94+ grill and all new lights and smoothy, sport grill. Much improved in my opinion.
Mar 2, 2013:
Updated the web page with a format I like better. Still a work in progress.
Jun 29, 2013:
The transmission went out about 3 weeks ago on the way to work. I have been so busy I have not had time to take it in to get worked on. I have been in a rental car since. After it was parked about a week, I came home from work to find a huge puddle of ATF under the truck. Did some googling and found that on many different kinds of vehicles this happens. What happens is that after awhile the transmission fluid drains back from the torque converter into the transmission causing an over full condition. How the fluid gets out of the case is not clear to me. Maybe it is from a bad gasket or perhaps from a vent. I did see one web site mentioned that where the shift linkage goes in to the transmission case can be a cause of leaks. Whatever, it made a huge mess.
I was surfing the web awhile back and came across some sites where people were plasti-dipping various parts of their cars. I saw people plasti-dipping, emblems, door handles, wheels, even the whole car. I picked up a can at Walmart and plan to do my emblems and nerf bars.
Jul 5, 2013:
Plasti-dipped the rear emblems and the front edge of the hood where the paint had flaked off. Used a clear coat on the hood. Still want to do the nerf bars. Considering doing the front and rear bumpers and maybe some interior pieces. Also, may do the door handles.
Jul 25, 2013:
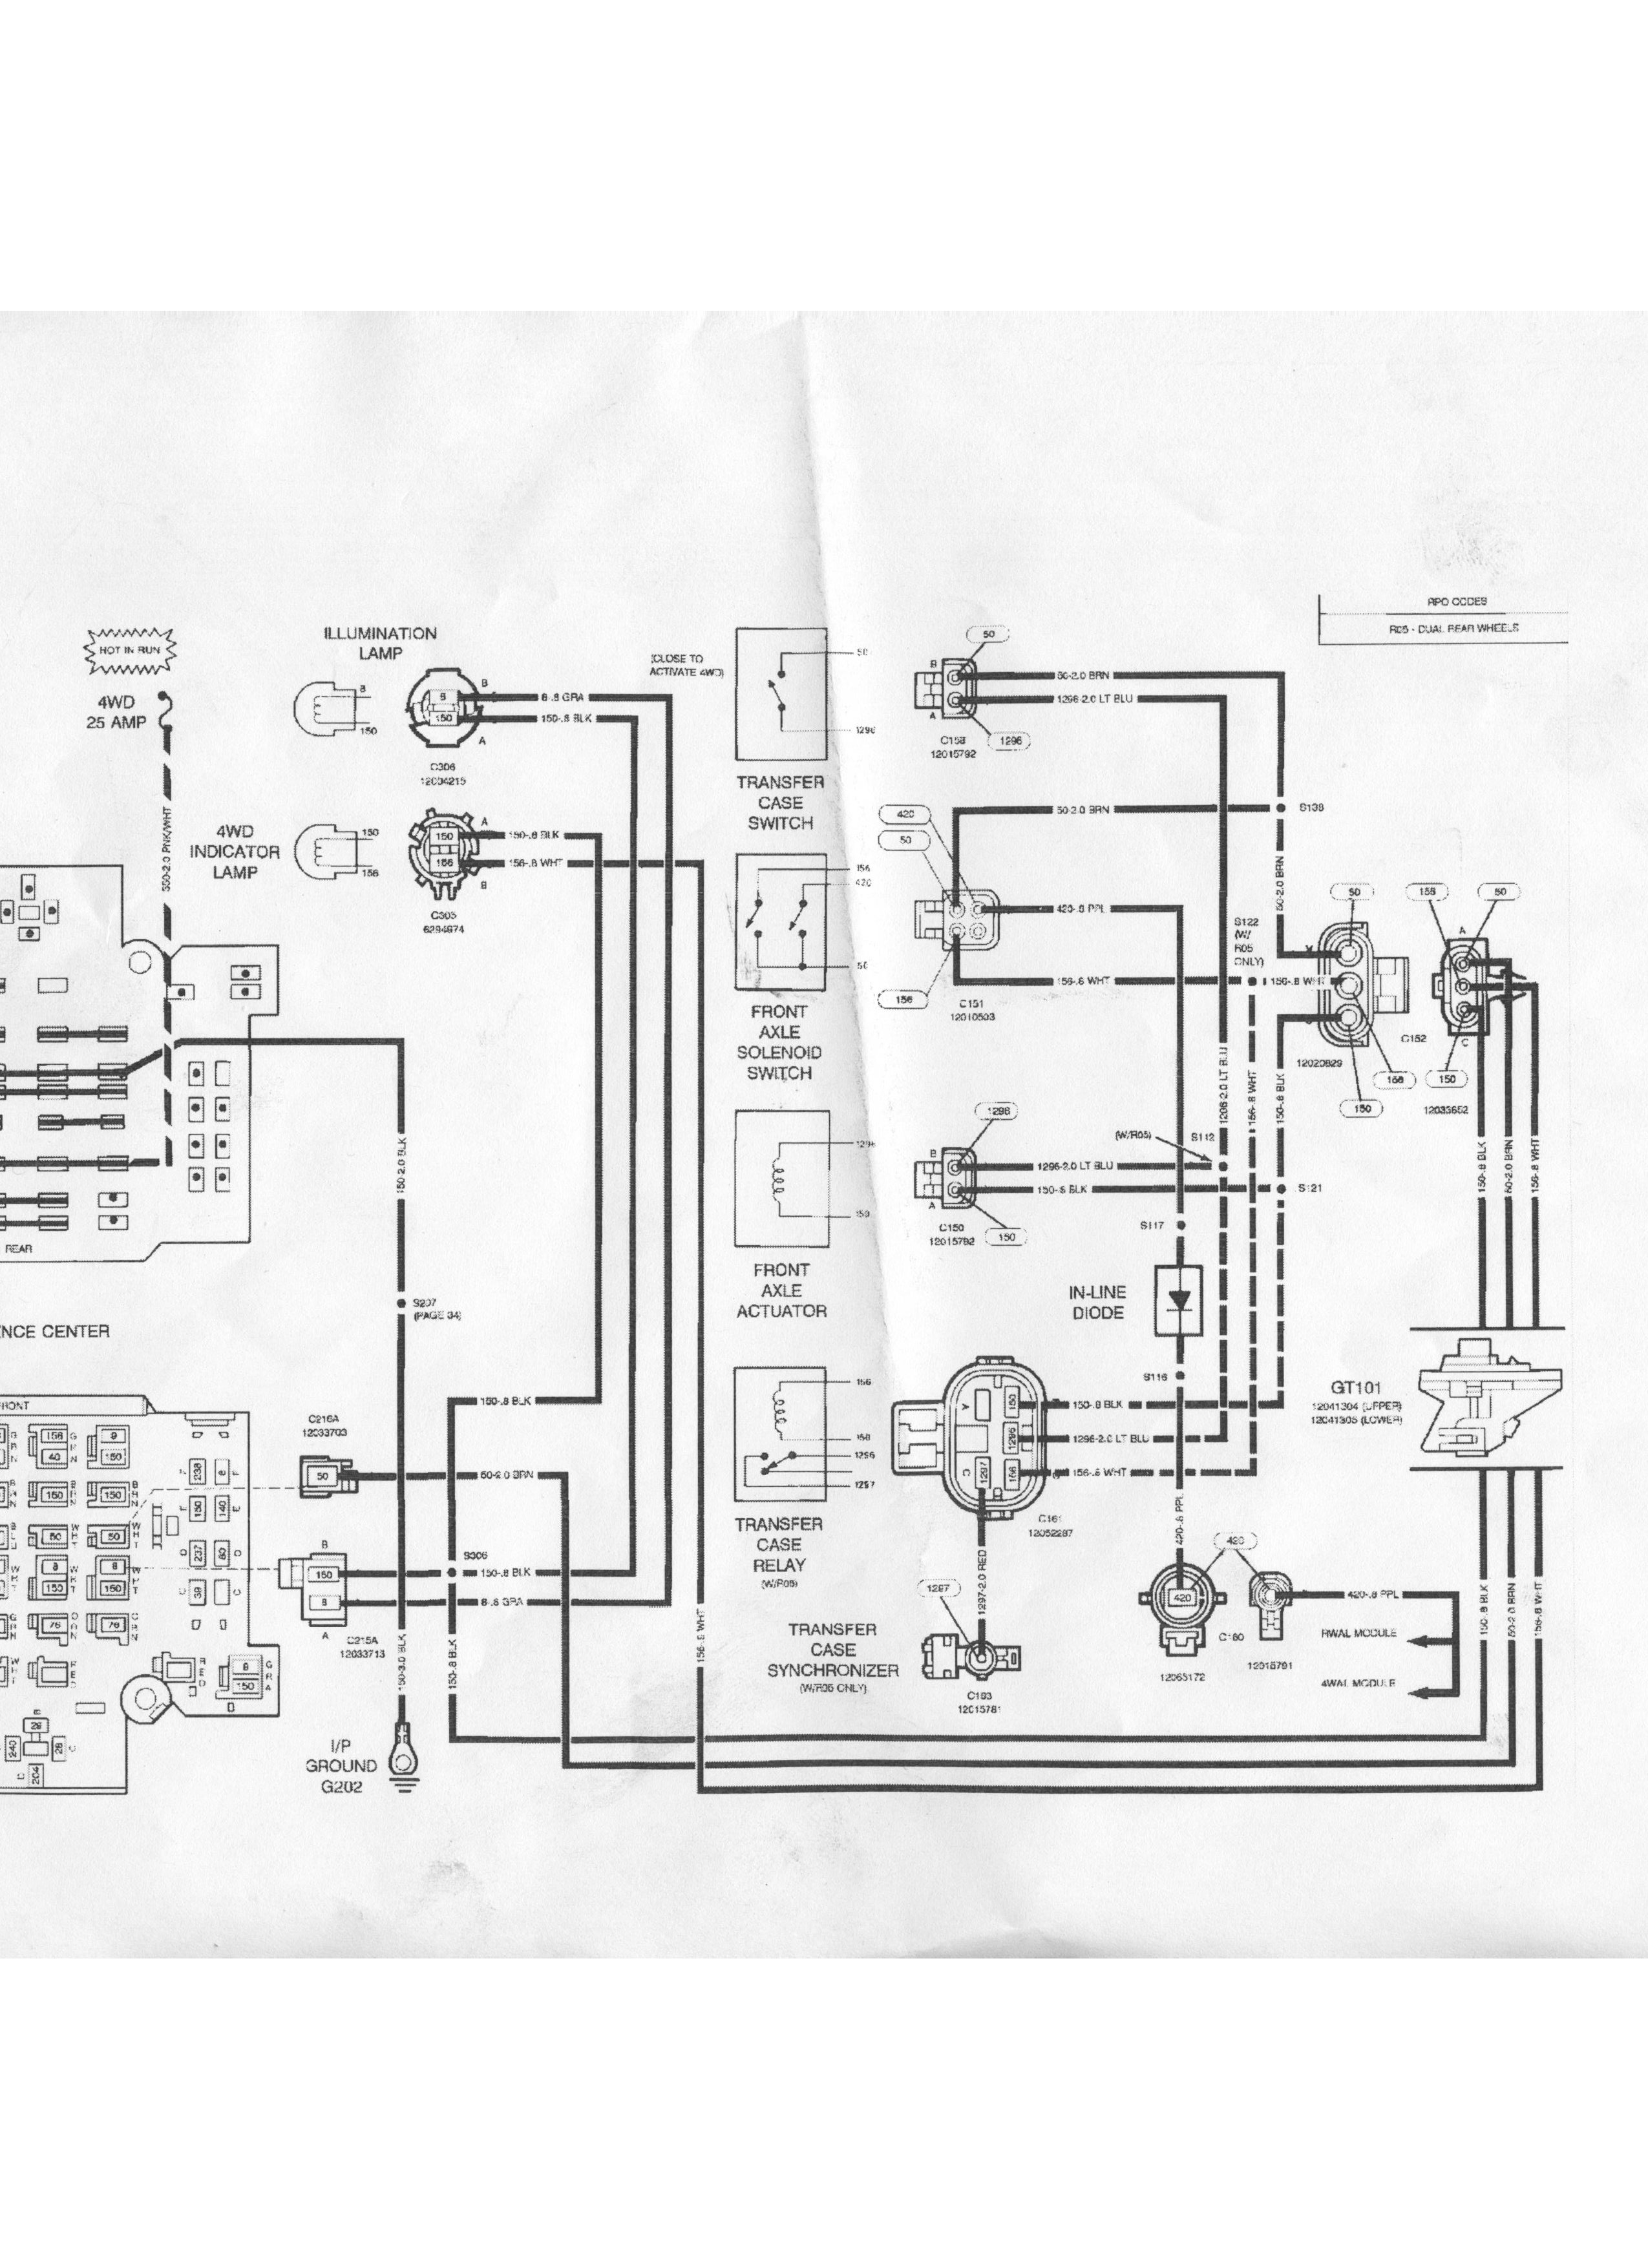
Finally took the Yukon to my mechanic about a week ago. Was delayed by vacation, Wylie coming to visit from North Carolina for a month, and just being too busy. Anyway, I was able to drive the car the 30 miles to the mechanic, although the last 5 miles or so I wasn't sure she was going to make it. The whole truck shimmied when taking off, never shifted into overdrive even though I was going about 60mph for most of the trip. Was really happy when I pulled intinto the shop. I asked my mechanic to fix the transmission and to replace the right front axle seal which had been leaking since I owned the thing. While it was in the shop the mechanic checked the OBD codes and it had codes for EGR, O2 and transmission. He cleaned up the O2, replaced the EGR and of course fixed the trans. He also found that the rear diff felt to tight and niticed that there was gear lube leaking out all over the right rear brake drum. He found that the magnet that is supposed to be catching metal shavings has shattered and was all over including in the bearings. So he rebuilt the rear. He also found that the engine oil cooler line (near the oil filter) was leaking so he replaced those fittings. While fixing the front axle seal they couldn't get the axle back in so they had to pull the whole front differential, split it apart to get the axle back in. They found a piece of metal blocking where the axle needed to go and was not sure the axle was ever in right to begin with. That added quite a bit of labor to what should have been a maybe 2 hour job. He said there is still an electrical issue with the front diff so it will not go into four wheel drive. He offered to fix it but I said I would take a hack at it. He gave me the 4x4 Electrical schematic of the whole circuit which should help. So as of now I have a new rear, new trans, new EGR, semi rebult front diff. All leaks should be fixed. While dfriving in to the mechanic's shop I noticed my radio doesn't work and while it was parked I noticed my rear hatch open switch on the dash doesn't work. Hoping this is just a fuse.
Jul 27, 2013:
The Check Engine Light came on on the way to work yesterday. Took the Yukon in for emissions during lunch and it failed for gas cap, CO2, NOx. Think it is probably the EGR. Need to see what the error codes are now. Plan to change the EGR, plugs, wires this weeken and test it again.
Jul 28, 2013:
Pulled EGR and checked it. The vavle itself seems OK. Noticed that combination of "salad shooter" Power Flow air intake thing does not work with open element air cleaner. It was not sealing correctly. Removed in and fabbed a new air intake to vavle cover tube. May have been leaking air. Will see how it does today.
Jul 29, 2013:
Checked the engine codes. Still getting Code 32 EGR "Vacuum switch shorted to ground on start-up, switch not closed after the ECM has commanded the EGR for a specified period of time or the EGR solenoid circuit is open for a specified period of time. Replace EGR valve." I bought a Mightyvac to check the vacuum at Sears. It was only $32. Checked the throttle body out and getting around 19 in HG which is plenty. Connected to the EGR and tried to pump up. The EGR would not hold any vacuum. Bad EGR. I am going to try to get an AC Delco one just for better quality. The old EGR that was originally on there would hold 15 inches pretty good but I am going to go with a new one. Did not test the solenoid.
Nov 23, 2013:
Got an AC Delco EGR valve and installed it. Still getting code. Still fails emissions. I think I have a vacuuum leak somewhere.
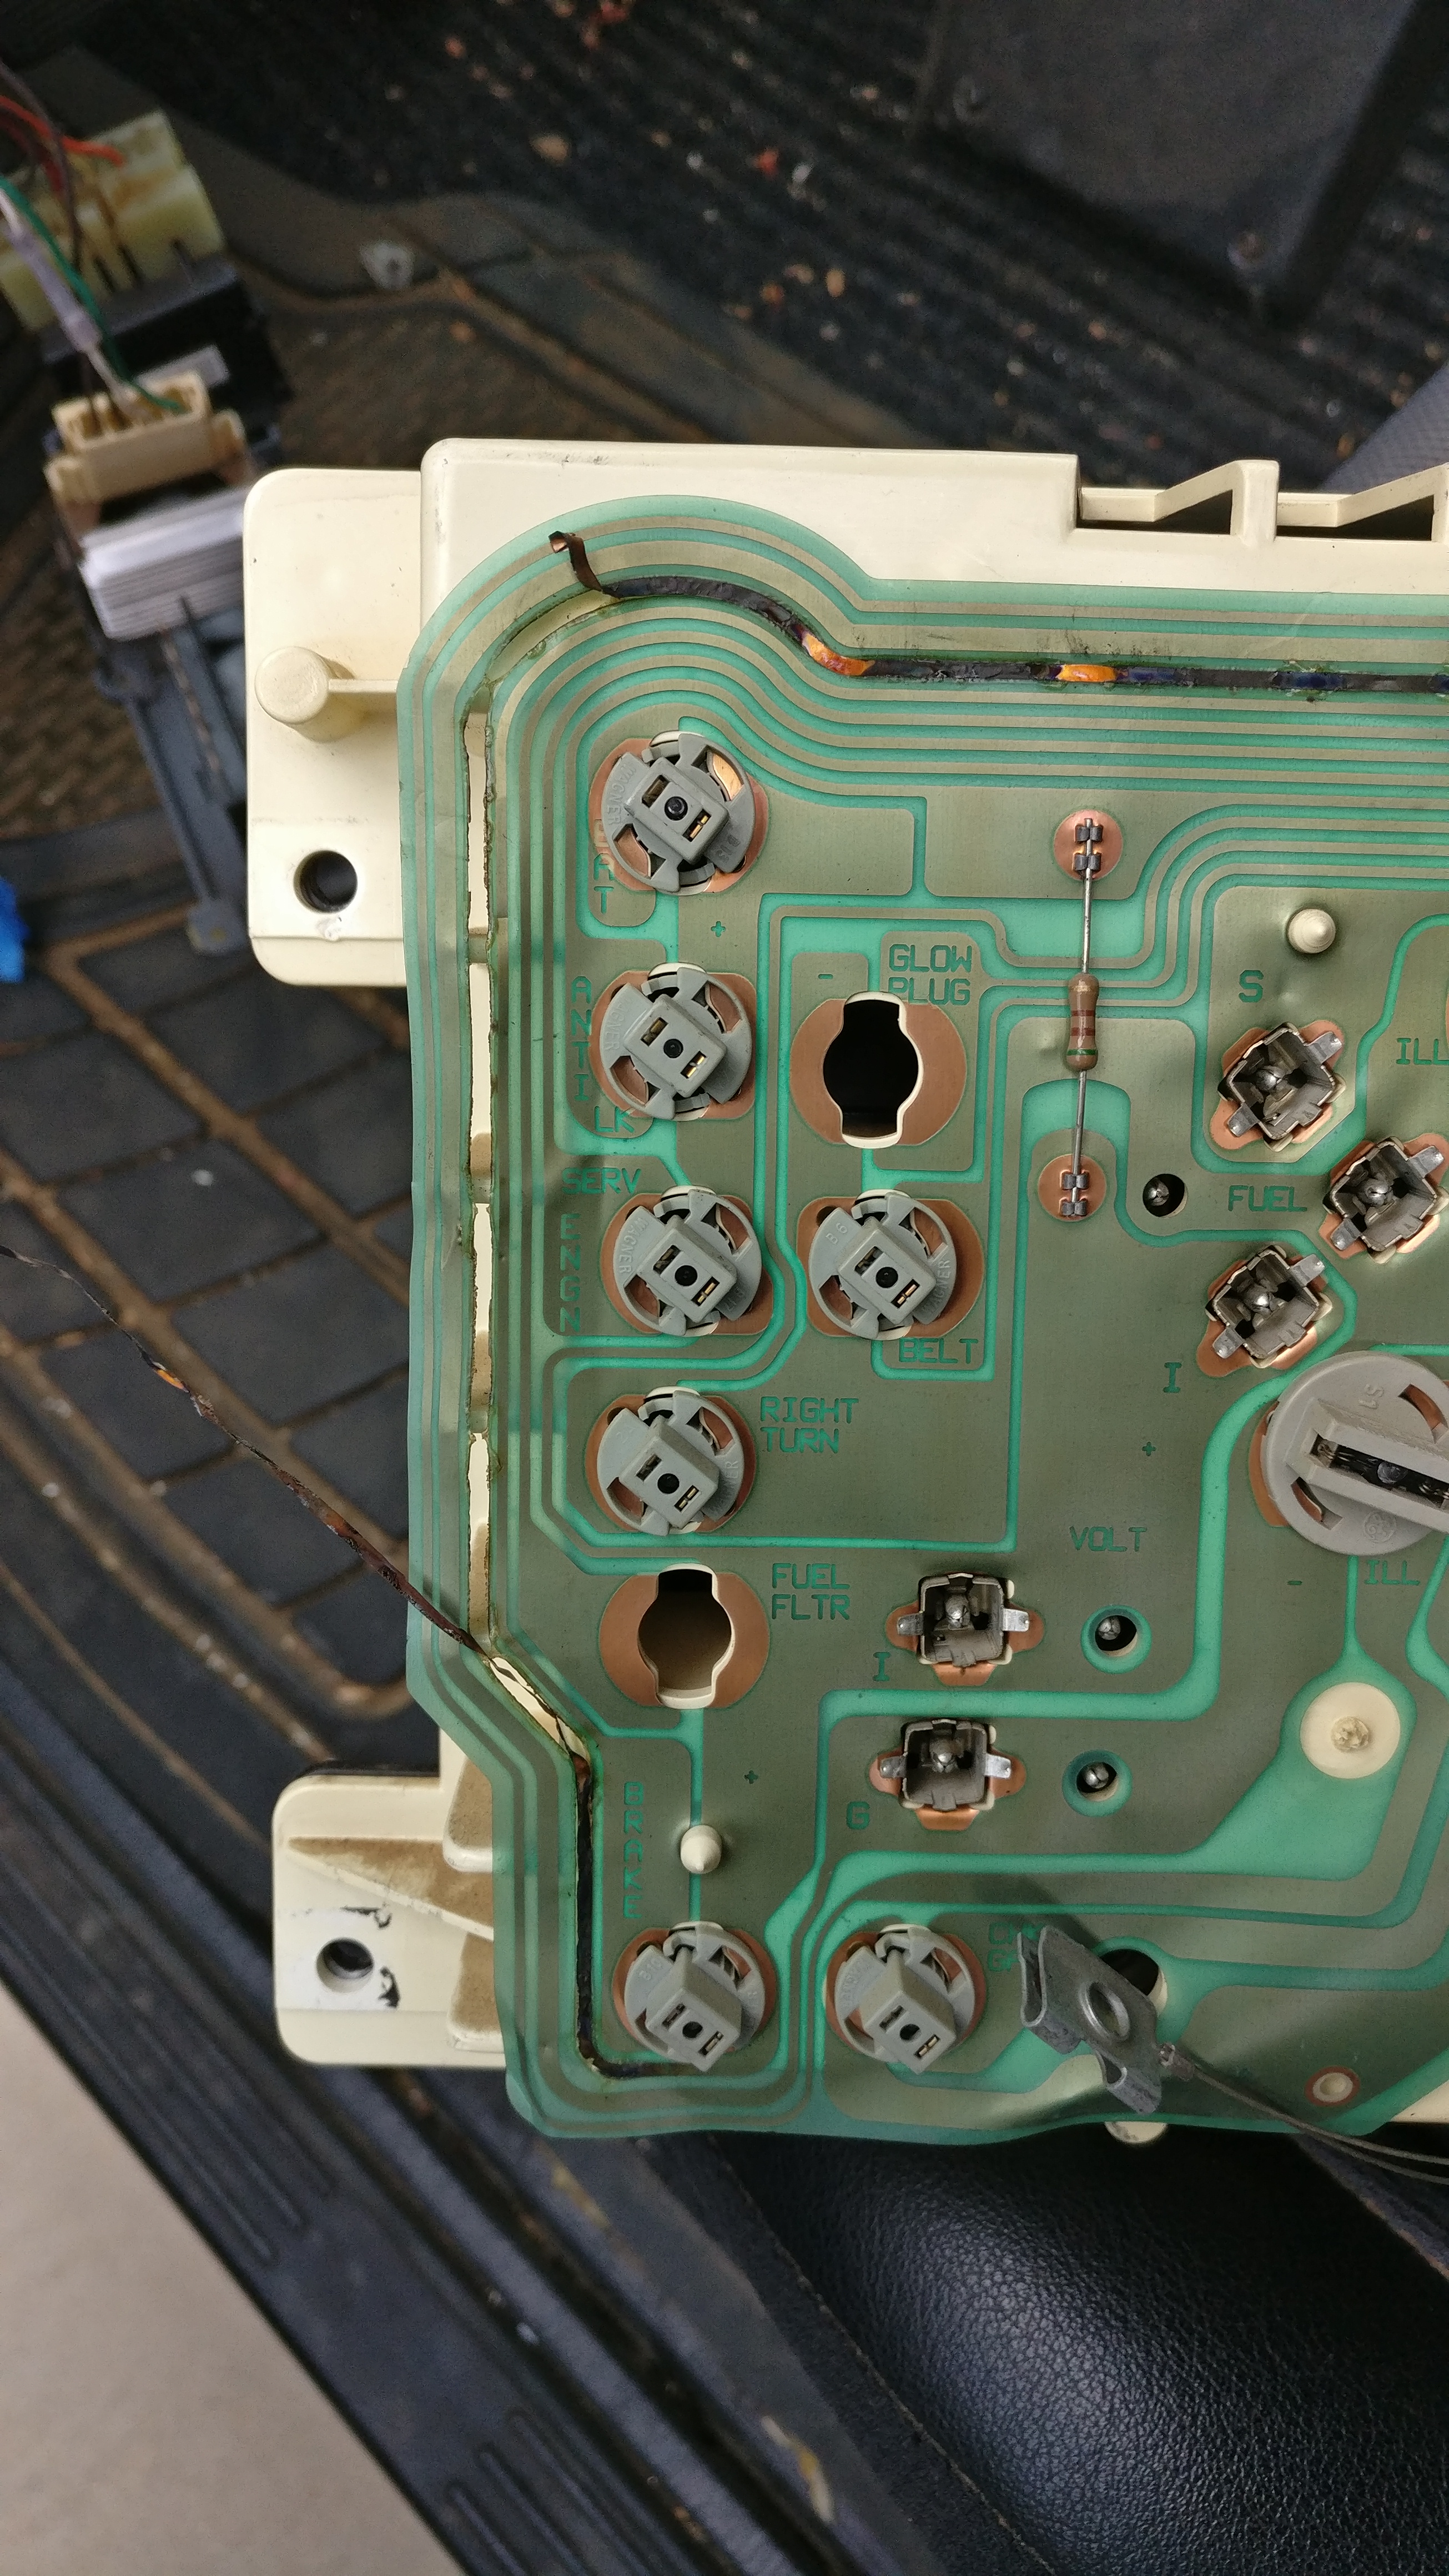
Have been cleaning up the interior. Removed all interior panels and carpet except for very front. Rear seat, seta belts and headliner is out. Bought material to do headliner. It is black with a texture to it so it looks kind of like leather. Also bought runner rugs from Home Depot to do interior and door panels which was previously covered with carpet-like material. What I've done so far looks nice. Holding off on re-installing everything until I insulate to keep some of the Arizona heat out and sound deaden to quiet it down on the inside and to quiet some of the rattles. With the interior panels off I now see a wiring mess under the dash and in the kick panels. I see relays and a fuse box that are not from the factory. Want to clean this up while I have it apart. Maybe this will fix some of the electrical weirdness I have seen from time to time.
A couple of days ago my oil pressure gauge started going to 0 when stopped at a light. I am sure this is an electrical issue or sending unit issue. I have a brand new sending unit in the garage that I can put on to see if that fixes it.
Have pretty much decided to go with a more sporty look for the Yukon. Want to lower it, get a cowl hood, take off the fender flares, get tires more sporty looking and I thing Torq Thrust wheels.
Dec 19, 2013:
Have been working on the interior most weekends. Interior is sitting in my garage except for the dash and front door panels. Mostly painted and ready to reinstall. Have installed sound deadener/insulation in the back floor and passenger side in the front. Need to pull the driver's seat and do that and the center hump. Is much quieter now although there is no carpet. Also want to do the top before I reinstall the headliner and the sides before I reinstall the interior side panels.
Still haven't found decent seats. Would prefer black leather buckets (and console) from a newer GM vehicle. Had a line on seats from a Silverado SS but I was too slow on those. They would have been ideal. Looking on ebay, craigslist but have been too busy to spend the time needed.
Just last night ordered new sport truck side mirrors for each side, interior air vents to replace the 3 (out of 4) broken ones and new rear leaf springs. Maybe this will all come while I am off for Christmas. Also, Kristie got me a new rear-view mirror with auto-dim, temp, compass, map lights. Looking forward to having this.
Got a ticket for expired registration. Got this while driving with Kristie to get a rental car after dropping her Yukon off to get the transmission rebuilt. Great! Anyway, this will force me to figure out why the Yukon is failing emissions and the pretty much daily check engine lights. Scanned the codes last week and now getting code #34 - EGR failure and #44 - lean condition. That is a new one. This could also be caused by a vacuum leak but could also be O2 sensor or low fuel pressure. Could also be getting too much air due to my nice, high flowing air intake filter. Need to get my adjustable fuel pressure to ~14-15 psi and go over the thing looking for vacuum leaks. This may all be due to as simple a thing as a cracked vacuum line. I just hope it in not a leak uner the intake manifold.
Dec 20, 2013:
JC Whitney sent me an email saying the springs I ordered are out of stock and that they are cancelling my order and refunding my money. Found another set after some searching from Auto Parts Warehouse. Ordered these last night and then today I got an email saying the same thing JC Whitney said. I've already called local junkyards and spent a few hours looking online. Right now I don't know where to get them. I may be able to get them at a junk yard that is nationally connected. Not sure how interchangeable the '92 Yukon springs are with other years and models. On some of the spring websites they don't list '92-'94 and start with the '95s. Have a feeling that GM changed after a couple of years and that the ones I need are not as common and not as attractive to aftermarket companies. I did find some 3-1/2" lowering springs. I am wanting to lower the truck but I can't afford to do the front right now and I don't want the back lower than the front. I think I also need new wheels/tires before I can lower the front so would be big bucks to do that.
Mar 4, 2014:
Finally found my rear leaf springs. Ordered them and they came about a week ago. I've been too busy to install them so far though. I did remove the soft rubber bushings that came with the springs though. I just drilled enough holes until I could pull/pry them out.
Picked up a can of Sea Foam last night and did a top end clean of the engine. I warmed the engine and let 1/3 of the can be sucked in through the PCV valve, poured 1/3 of the can into the crankcase, and poured 1/3 down the throttle body while it was running. Smoked like crazy. Seemed to run better today. Took it in for emissions testing again today and it failed again for HC, CO, and evap. Passed NOx which was failing before and which is what Sea Foam is supposed to clean up. Carbon monoxide went from 29 on the last test (passing is 25) to 120 this time. Not sure what that was allabout although there have been a few times I have smelled gas including while they were testing it. Not sure why the evap failed. this iss the first time that has failed. Looks like I get to work on it some more. Things I might try:
Maybe the code 44 will be gone with the new O2 sensor...
Mar 30, 2014:
Tore into the truck to figure out what was causing the EVAP failure. Dropped the fuel tank and saw there are 2 evaporative purge valves on the top of the tank. Both of the exsiting ones were broken and nothing was connected to them. I have no idea how it passed emissions 2 years ago since it could not have possibly held a vacuum then either. I got 2 new purge valves from NAPA along with some fuel vapor fuel line and fittings. Installed the valves and connected them to the exsiting line that goes to the cannister under the hood. While I was putting everything back together I noticed that one of the wire which goes into the fuel pump hanger and the to the fuel pump had pulled out inside the connector. No way to reconnect it. I made another trip to NAPA and got a whole new fuel pump hanger which included everything new including the fuel level sender and fuel level float. New fuel pump not included. Dropped the fuel tank again and this time cleaned it up real good and painted it while it was out. Put everything back together and the truck fired right up and now my fuel level appears to be correct for the first time since I bought the truck. I am planning to go back to try the emissions testing again tomorrow. Plan to run some more Sea Foam through it and chnage the oil tonight just for extra insurance.
I have had an oil leak for months now. I have also had a bad oil pressure sending unit for months now. I had tried to track down the oil leak and all I could ever figure out was it was coming from somewhere on the top of the enging., I assumed vavle covers. It didn't occur to me that the oil leak and the oil pressure sending unit were bothe the same issue. Watched a Youtube video and saw that the oil pressure sending unit will start leaking when it starts failing. On the downside, GM, in it's infinite wisdom put the oil pressure sending unit under the distributor so that you have to pull the distributor to change the unit. Tried to do that today also but ran out of time.
April 15, 2014: The truck failed emissions again on Mar 31. It failed for EVAP again and the emissions also. I gave up on figuring out the EGR and took it to my mechanic. He said that both the EGR solenoid (which I had replaced) was bad and the EGR had some carbon on it keeping it from closing. I had replaced the EGR also with a genuine GM one. The intake is also new so I was suprised there was any carbon. My mechanic also has a smoke machine which he could find the EVAP leak. He said that the new purge vavles I put in the fuel tank had to be put it just a certain way to not leak. He said he messed around with them for a long time before they quit leaking. I drove straight from his shop to the emissions place (5th attempt) and it passed with flying colors. Also, did not get any check engine lights on the way there or in the almost 2 weeks since. Also, on my last tank of fuel my mpg went from 10-11mpg to 15.95 mpg! Not sure if that is a fluke or not. Will definitely be watching the next few tanks. I thought I might get an extra 1-2 mpg but not a 50% increase. With the miles I drive daily this will save mucho dinero. I still need to do the oil pressure sending unit and figure out why the antilock light is coming on. Just a note but over the weekend I washed and waxed the truck and cleaned the wheels really well (looks great!). This morning on the way to work...no antilock brake light. On the way home it was on though. This makes me think maybe some serious cleaning around those wheel speed sensors may do the trick. It also seems I am no longer losing brake fluid or coolant. When the truck was at my mechanics he commented on how swollen my upper radiator hose was. I looked and yes. It looked kind of like a balloon animal. I replaced that also.
My emissions woes for this year:
| 7/26/13 | 8/19/13 | 3/3/14 | 3/31/14 | 4/3/14 | Standard | |
|---|---|---|---|---|---|---|
| Hydrocarbons (HC) in grams/mile | 2.64 | 2.66 | 3.22 | 2.17 | 1.07 | 3.00 |
| Carbon Monoxide (CO) in grams/mile | 29.37 | 32.91 | 120.56 | 32.08 | 17.98 | 25.00 |
| Oxides of Nitrogen (NOx) in grams/mile | 12.26 | 9.37 | 4.19 | 8.96 | 4.49 | 5.00 |
| Gas Cap | Fail | Pass | Pass | Not Tested | Pass | Pass/Fail |
| EVAP | Not Tested | Not Tested | Fail | Pass | Pass | Pass/Fail |
| Pressure Test | Not Tested | Not Tested | Fail | Fail | Pass | Pass/Fail |
Next up:
Then, new seats, re-do dash, new instrument cluster, new carpet, install headers, lower it with new wheels/tires, etc.
April 19, 2014: I filled up again last night. On this tank I had run the A/C quite a bit including some sitting in the truck with it running while eating my lunch. MPG was 14.8! This tankful I ran it down to nearly E which made me very nervous. It took 22.5 gallons to fill it and since in the past I have put up to 27.7 gallons which means I probably had another 5 gallons left with the fuel gauge right above E.
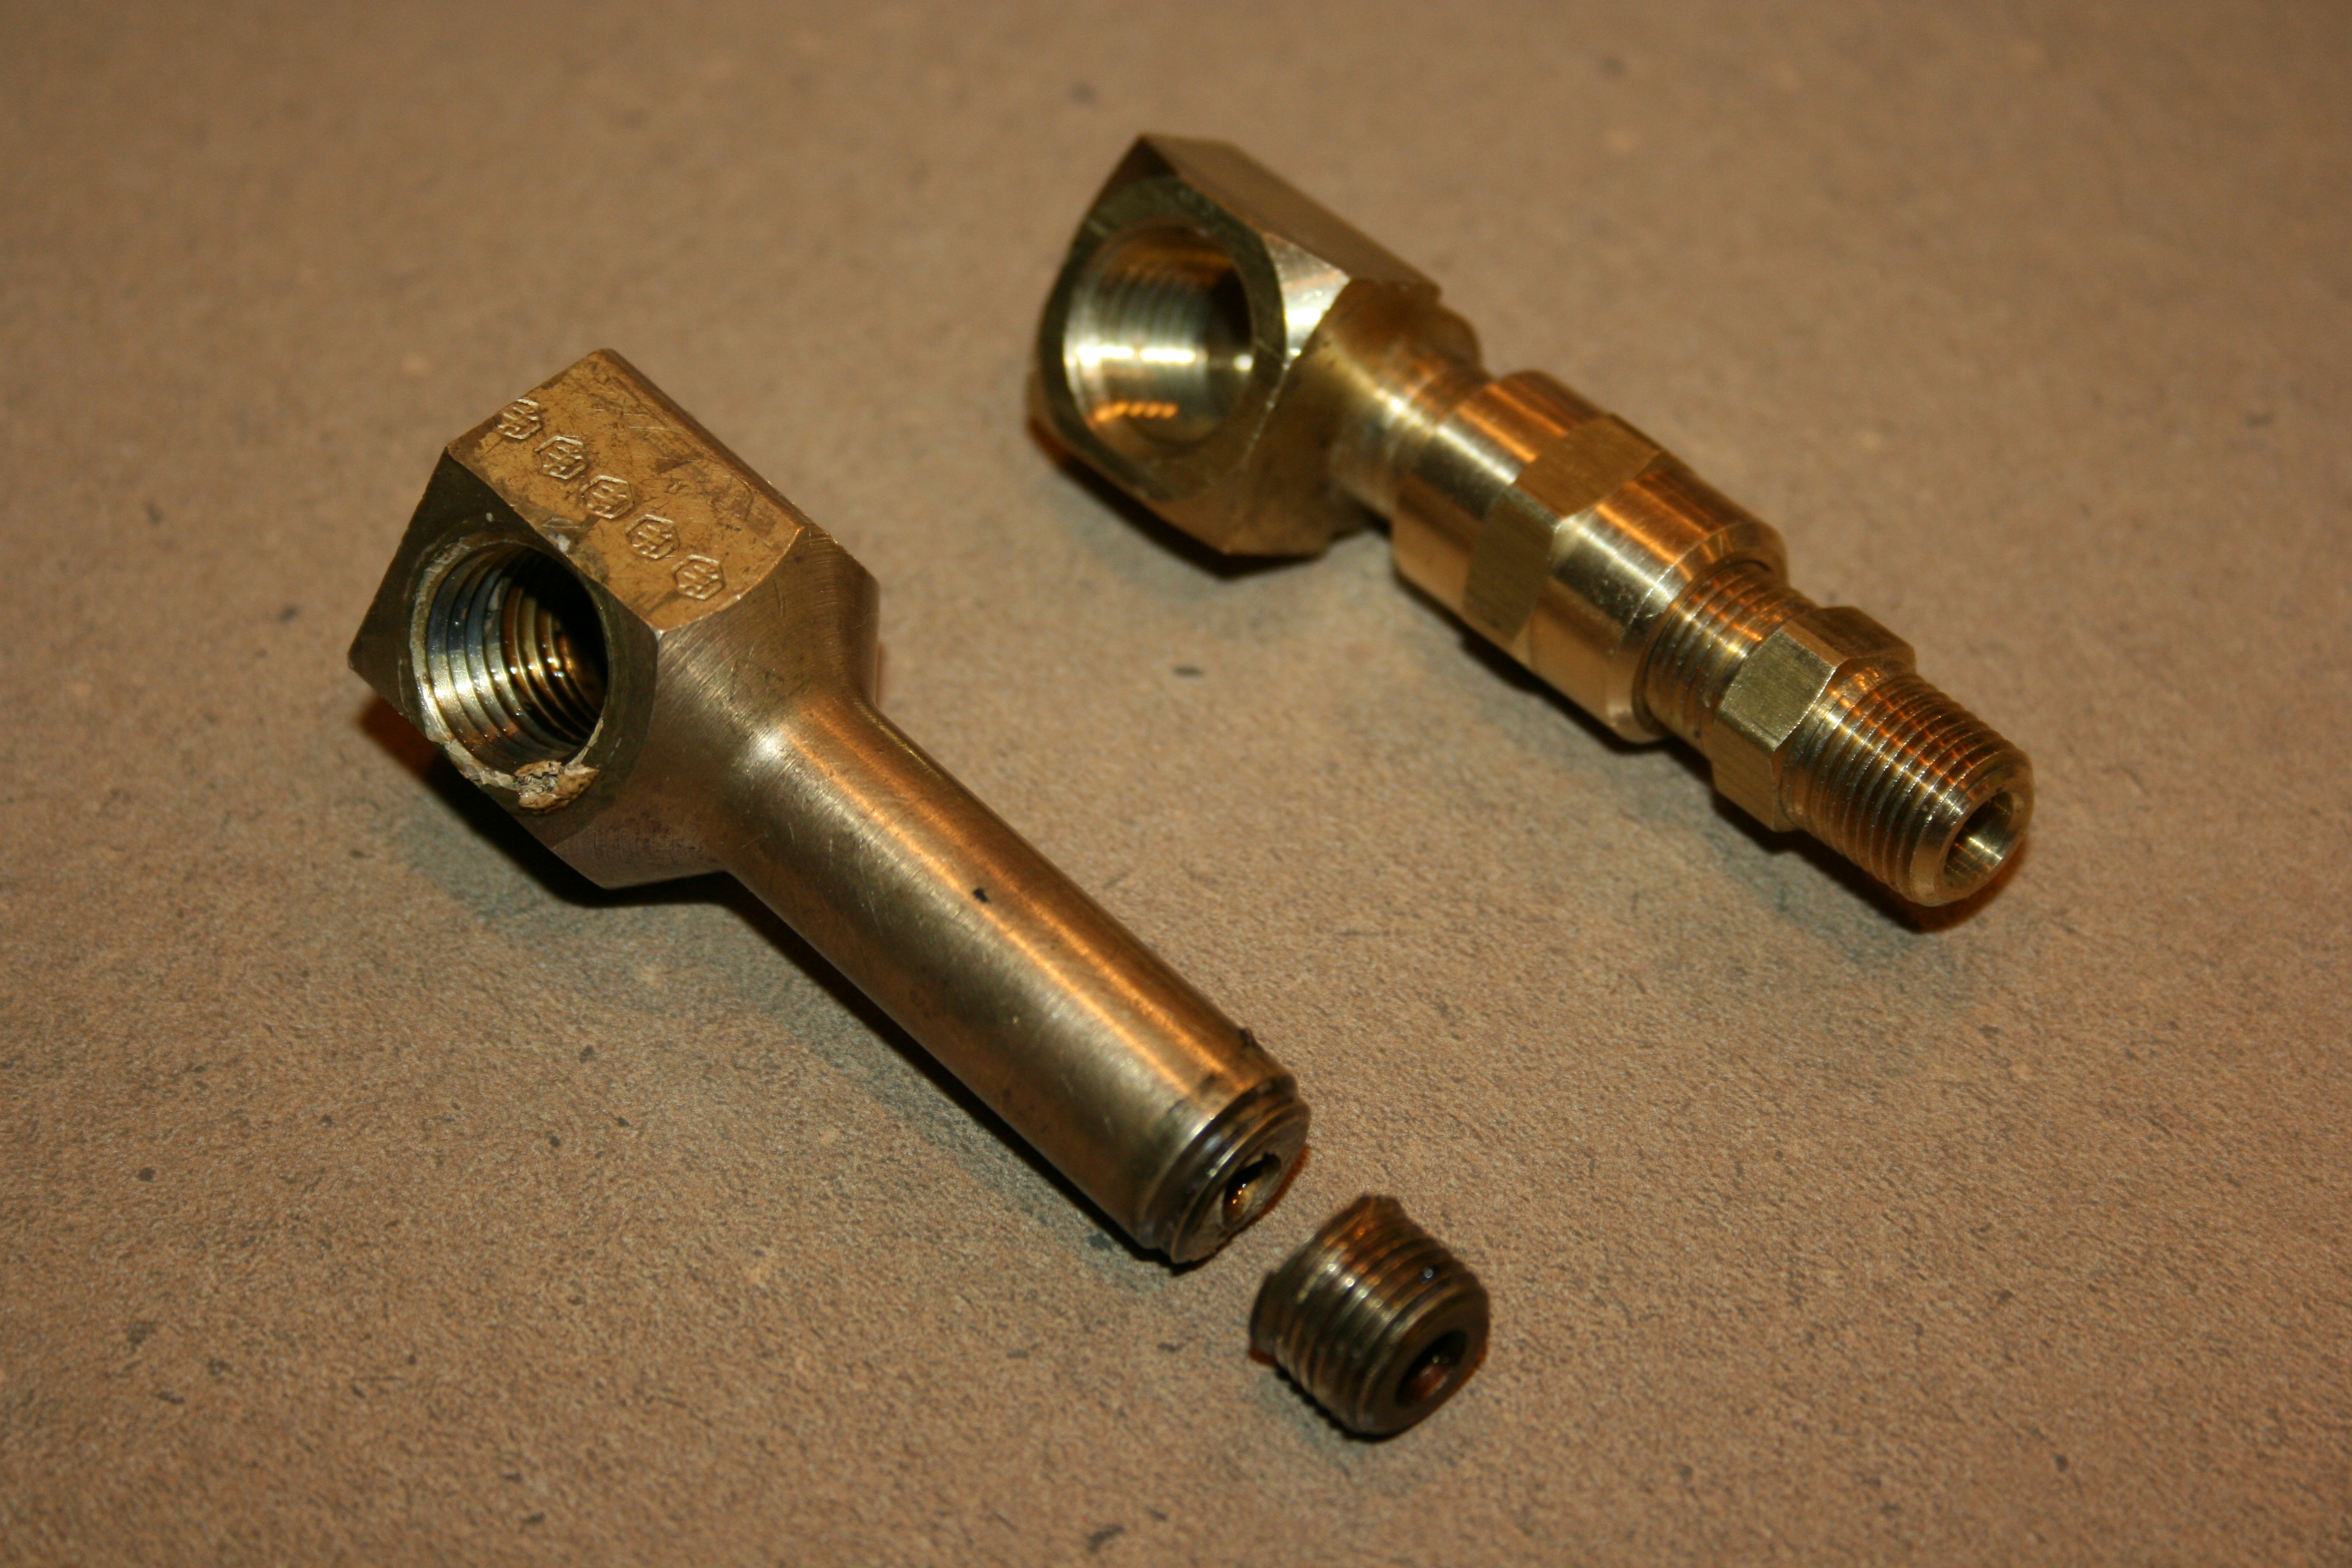
April 20, 2014: Finally got around to fixing the leaky oil pressure sending unit. I've had the new one sitting on my workbench for six months but always had more pressing issues. The oil pressure sending unit sits under the distributor and I could not find a way to remove the old one with the distributor in there so pulled it. Seems like the previous owner installed the sending unit with some kind of glue because it was really in there. In fact, I managed to snap off the brass fitting flush with the top of the block trying to get it out. Lucky for me Stephanie and James pulled up about the same time this happened. James ran home and got his Easy-Out set for me to borrow and luck for me the broken piece came out pretty easily. Then I had a little trouble finding a replacement brass fitting replacement. Finally a guy at Napa made a replcement out of 3 brass fittings. Put everything back together and now oil pressure is back to normal and hopefully my leaks are gone.
|
Broken oil pressure sending unit fitting and 3 piece replacement fitting
July 19, 2014: Gas milage didn't stay at 15 MPG for long. Since it got hot and the A/C is constantly I have been getting 11-12 MPG for the past couple of months. Odometer rolled over to 300K miles last week! Still running strong. I installed my compass/thermometer auto-dimming rear view mirror. Very useful especially to see how hot it is in this Arizona summer. Last month the SES light came on. Also noticed that my gas mileage had dropped to around 10 MPG. I checked the codes and it was lean exhaust which meant O2 sensor. I checked my receipts and saw that I had not long ago replaced it and took the old one to O'Reilly's and got a new one no charge under warrenty. Everything was good for awhile until yesterday when the SES light came on again on the way to work. This time for 32 (EGR) and 44 (lean exhaust). Light did not come home on the way home from work so I'm just going to watch it for awhile. Have been working on the dash. Fixed the headlight switch which had broken mounts. Replaced the busted A/C vents. Headliner material has been replaced but the headliner is not back in yet. Pulled off my dash cover. I had forgotten how bad my dash is busted up.
June 19, 2015: Transmission is going out. It makes a tick-tick-tick sound. It started about a month ago while driving on the 101. I've been babying it since then, not driving on the freeway, taking off sloww, etc. Seems to be some slipping too. This transmission has already be rebuilt once by me. I just so happen to have the T56, clutch, flywheel, clutch slave cylinder sitting in my garage that came out of my T/A. I'm pretty psyched about doing this conversion. I will have to lose the 4x4 (keeping it would mean a Corvette transaxle T56 and some custome made adapters).
Plans:
I put down yet another layer of sound deadener on the rear floor including over the wheel wells. I finished up the headliner recover and added a layer of the aluminum insulation on top of the headliner. I had already glued a layer of this to the underside of the roof. I re-installed the headliner and I am amazed at how quiet the ride is now. No wheel noise, wind noise, etc.
While re-installing the headliner I knocked the rear-view mirror off. OK, no problem, I've glued those buttons on plenty of times. I bought some glue for this from Walmart. On the directions I saw that it said to do this when temperature is between 50-75F. This is June in Arizona and we won't see 75 degrees until October. The low temperature in the middle of the night is usually >85. I didn't have any choice so I tried anyway. Glued the button on and held it in place with some masking tape and let it sit overnight. The next morning I attempted to put the mirror on and almost as soon as I started it fell off. Bought some more glue and tried again. This time I let it sit the whole weekend and I put a rag on the outside over where the button was attempting to keep it somewhat cooler. Again, before leaving for work, I attempted to put the mirror on. Same result. Feeling the glue, that had been setting up for several days, it was still sticky. I've been driving without a rear-view mirror (and compass and temperature) for about a week now. I havn't tried again but maybe thrid time is a charm.
August 3, 2015: Bought a Belltech lowering kit. Came with lowering rear leaf springs, arm keys, and four sport truck shocks. Installed the rear leaf springs and rear shocks today. Picked a great day to do it as it was 112 degrees today and I did it in the sun in my driveway with hand tools.
| Ground to fender lip | Top of tire to fender lip | |
| LF | 35" | 4.5" |
| RF | 34.5" | 4.5" |
| LR | 37.5" | 7" |
| RR | 37" | 6.5" |
August 15, 2015: After driving for several hundred more miles with the tick-tick-tick sound coming from he transmission I decided that the noise sounded more like it might be the flexplate hitting the starter or inspection cover. I had previously tried to remove the inspection cover but couldn't get it off because the exhaust runs right under it. Today I dove in and took the exhaust loose from driver's side exhaust manifold. I also took the starter out since it seemed like it might go out that way. It wouldn't. When I got the inspection cover off I could see one flex plate bolt was so loose it had been hitting the inside of inspection cover. The bolt was pushed to the side and the threads were dinged up. Only one of the flex plate bolts was tight. Since I didn't have any extra flex plate bolts and the Yukon is now my only vehicle I just moved the dinged up one to a different spot on the flexplate and put a good bolt in the hole of the one that was loose. I put Locktite Red on all of the bolts and torqued them all to 60 lbs-ft. I think tht should be the end of the tick-tick-tick saga and my stress level has dropped by half and now am in no rush to put the T56 in (again since I don't haave another vehicle to drive while doing the swap which may take weeks.
I have a new issue in the front suspension. I get a "shimmy" every so often. It has happened probably 5 ties in the last week. It seems to happen after going over bumps or dips in the road. I figured it was the tied rod ends so I bought both outer tie rod ends and adjusting sleeves yesterday. Took the front tires off and I don't see any play in the ties rod ends. In fact, I don't see any play at all and the tied rod ends look pretty new like the previous owner probably changed them. I'm returnin the tie rod ends.
August 19, 2015: After I put the starter back in from fixing the loose flexplate issue it was dead. Pulled it back out, took it to Autozone and they tested it. It failed all tests. I had bought the starter there about 3 years ago so I got a new one free under warranty. When I put the starter back in it started right up. I took it for a test drive and everything was great. I did notice it pulling to the right while braking. Might be the left front caliper stuck open or kinked brake line. After about 5 minutes on my test drive I turned onto a main road and everything just shut off. No lights, nothing. I was able to coast into a Subway subshop parking lot right into a parking space. Popped the hood and battery cables were too hot to touch. When I put the new starter in I wasn't careful enough and shorted the positive battery cable against the exhaust manifold. It was about 110 degrees and just didn't pay close enough attention. So now I am about 1.5 miles from home with no tools and it was 107. Walked home and got a ride to get a rental car. Came back the next night and pulled the battery and took it home put in on the charger. Went back to the truck with a new battery cable at about 10pm when it had cooled off to about 100 and changed the positive batter cable in the Subway parking lot. Wasn't sure I would be able to change the cable on the starter without pulling the starter but worked out pretty well. Put the now charged battery in and the truck started right up. Drove it home and walked back to Subway to get the rental car. All of this Because I was careless putting the starter back in. Now to take a look at those brakes...
Oct 3, 2015: I have been having front suspension issues for awhile now. I hear rattling up there and a few times I have had a shimmy in the steering wheel which is kind of scary. So far I have replaces upper ball joints and inner and outer tie rods on both sides. It seemed better for awhile but now seems worse than ever. I tried several times to find where the problem was but could never find it. Today I took it in to Network Automotive in Queen Creek for an alignment since I know the alignment is off and hoping that that would make the shimmy/oscillation better. I knew they would check out the front suspension also. They looked at it and took me back and showed me that both lower ball joints are bad, right upper control arm bushing is bad, play in the pitman arm and excessive play in the sterring gear box. They gave me a quote for $1005 for 1 side upper contral arm bushing, both lower ball joints and alignment. Around $65 was just for the lower ball joints (4 hours labor). I told them I would do what I could myself and bring it back for alignment. They were very cool about it and didn't charge me. I really appreciated how they showed me the play in the bad parts and I saw what they did to diagnose the problems. I went to Autozone and bought both lower ball joints, one side upper control arm bushin, knock sensor and connector that I broke while fixing the loose torque converter bolt fiasco, and rented ball joint press tool and bushing press tool. Parts were about $105 and $179 for tool rental which I will get 100% back. Luckily it is Saturday morning and the heat is not as bad today. It is supposed to be about 95 degrees today. If everything goes well I may try to do the steering box and pitman arm. I can't imagine how much better it will drive when all is fixed and I get the alignment done. After doing all of that I will order new wheels, tires, and drop spidles. Too bad I don't have the drop spindles now so I only have to do the ball joints once.
Feb 27, 2016: Since the lst update I have finished rebuilding the front suspension. All together I did upper and lower ball joints both sides, inner and outer tie rods both sides, steering box, Pitman arm, drag link, upper and lower control arm busings both sides. All of that was a ton of work. Shimmy in steering wheel seemed to be mostly gone but still had vibration coming from the rear. I also installed a Belltech lowering kit which consisted of lowering rear springs, torson keys, and new shocks front and rear. This put the rear down where it should be. I'm pretty sure the springs I put on the back precviously were 3/4 ton springs. I took the truck in to Queen Creek Tire and had an alignment done. Drove much better. Once I had all of that straightened out it was time for wheels and tires. I struggled with what to go with for months. I considered converting to 5-lugs and getting some drag race style wheels. I really like the Torque Trust IIs also. Finally I went with some used 20" chrome Siverado SS wheels and Bridgstone P275/55-R20 tires which have about 50% of tread left. Bought these from a guy in Fountain Hills wh had swapped these for it looked like 24" wheels on his black Silverado SS (nice truck BTW). At first I though not much change but now I smile every time I see the truck. I think the wheels really make the whole truck look 100% better. Also I can't believe the difference in the ride. I realized I have been dealing with a rough riding, vibrating truck for several years. Getting above 60 MPH and it felt like the truck was going to fly apart. Now it is smooth smooth smooth and you can be doing 80 MPH befoe you know it. I have thought I had a bent rear axle since I bought the truck but it has been crappy tires the whole time.

|
Latest pic with new wheels and tires
Old versus new. Oct 2011 - Feb 2016
Apr 15, 2016: The truck has been running great. The ride is so much better with the new wheels, tires and all of the suspension and alignment fixes. This morning I went out to go to work and the key would not turn. It is not in the lock position and can go to "accessory" position and listen to the radio and roll up/down the windows but will not got to the Start/Run" position. It feels like there is crud or a wire or something interfering. It amost feels like I could turn it really hard and it may turn but it may also break... I walked to O'Reilly's and bought an ignition switch and rented a steering wheel puller. After I started taking it all apart and found that the steering wheel puller kit is missing a bolt which is used to get part of the guts out from behind the steering wheel. I managed to find a nut in my garage that, although was not exactly the same threads, was good enough to do what needed to be done. Once I got everything apart I saw that there is a spring in that complicated mess which pushed out a steel dowel to lock the wheel when the key is off. That spring came off whatever was holding it and the end of the spring got caught up in the rack and pinion type gear which engages the solenoid to start the engine. When I was putting it back together I found that I really needed that missing bolt to re-assemble everything. I put the steering wheel back on without all of the inner guts and drove up to O'Relly's and they found a bolt for me. Once I had the right tools it went back together pretty quick...except I had this extra piece left over. I looked and looked but couldn't figure out what it was or where it went. That's what I get for just tearing into it when taking it apart and not paying close enough attention. Anyway, everything seemed to be working, turn signals, flashers, tilt, wipers, etc...that is until I was driving later at night and I thought of the bright light switch. Tried it and yup, that is the missing piece. So now (when I get some time) I will have to rent the steering wheel puller again and take it all apart again and try to figure out how that extra piece fits in there.
Jun 25, 2017: Right rear tire that came on Silverado SS got a giant bubble on it about 2 weeks ago. Can't believe it didn't blow. Driving on my old wheels tires. Alignment is way off. Blew a radiator hose on the way to work on Friday.
|
Blown radiator hose
|
Hillbilly engineered fix
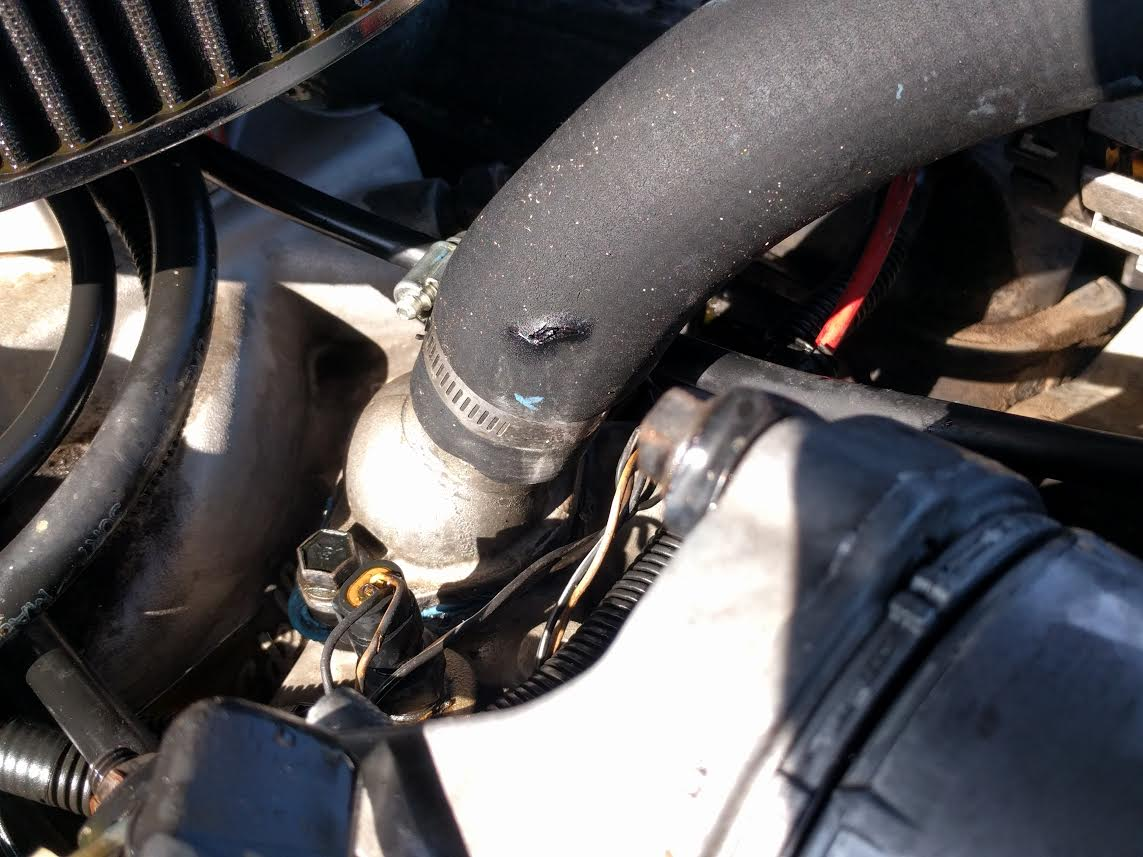
Today I trimmed the radiator hose to fit a little better. Still doesn't fit as well as I'd like. I drained all the water fountain water out of the cooling system and replaced with new coolant. I installed a new AC Delco coil, spark plug wires, rotor and distributor cap. The old rotor was very corroded and loose fitting. Maybe that was my issue? Also found that the MSD coil and spark plug wires I put on awhile back are not very good quality. My thinking back then was MSD was better than stock but not so sure nowe. After installing everything it seems like the engine is idling smoother, but may be my hopeful imagination. Anxious to see how the performance, gas mileage, and emission test goes after this. FYI, I also recently put in a new O2 sensor, spark plugs. Last weekend I installed a new thermostat. I noticed then that that radiator hose was soft. I always think about my Dad telling me to replace them when they are like that. I should have heeded his long ago advice.
Aug 14, 2017: Got new tires today. 285/50/20 Nitto 420S mounted on the Silverado SS wheels. I was really nervous about if these would rub in the front but have not seen any rubbing yet but have only driven it around the block. Will drive it to work tommorrow and if no issues plan to turn the torsion bar keys to get it as low as possible then need to get a front end alignment. The M/T wheels and tires will be going on the Suburban.
Dec 26, 2017: So, the new steering box I installed when I did the rest of the front suspension in Feb 2016 started leaking like crazy not long after I put the new tires on. I came out from work one day and had a huge puddle under the truck. Stopped at Autozone and bought 2 quarts of power steering fluid and filled it up to make it home. After I got home I saw that the leak was in the steering box output shaft that connects to the Pitman arm. Unfortunately I bought the box from rockauto.com who I really like but shipping this box back for warranty replacement was not an option. Bought a new box from Autozone, pulled the old box, swapped the Pitman arm over and reinstalled the new one. Only hard part with this (other than swapping that heavy box laying on my back in my driveway) was getting the Pitman arm lose from the drag link. Finally pursuaded it lose with a combination of pickle fork and BFH. Had to replace the castle nut after beating on it with a small sledge.
I installed the rear lowering shackles on Christmas Eve. Probably only took about 30 minutes. Only wrinkle (there's always a wrinkle) was that I saw the new shackle on the driver's side is right up against the rubber fuel filler tube. I wrapped the rubber filler tube in some aluminum roof flashing that my dad gave me probably 10 years ago and had never had a use for until now. Hope that is good enough. Worse case I will have to grind the shackle down so it doesn't rub. I don't think it should dangerous since it is metal rubbing on rubber. If it rubbed a hole in the hose I may have some fuel leakage when I am filling up. I will keep an eye on it.
Oil leaks on my driveway have been a problem with this Yukon since I've owned it. I fix one leak and another one starts. I just fixed the big power steering leak and I was hopefull I would be leak free for awhile but as soon as i finished this (and spent some time cleaning the oil spots in the driveway) I saw that it is leaking engine oil. Got underneath the truck and see it looks to be leaking from the engine oil cooler line where it comes out of the oil filter connector. I replaced both of these lines not that long ago because they were leaking where they go into the radiator. I read online and saw that many other people having that same issue. Several people said they went through a few rounds of replacing the lines and could not get lines that did not leak. People were also saying that the oil cooler was overkill on these trucks unless you were doing lots of towing (this Yukon did come from the factory with the tow package). I have to agree. I am going to eliminate the engine oil cooler on this truck which will get rid of those 2 lines which will clean up and simplify things. A while back I bought an oil filter relocation kit from Summit Racing to simplify oil changes and make them less messy. I had never installed it because it was just a "nice to have" but now I think it is time. I looked around in the engine bay and it looks loke the best place to mount the relocacted filter is on the frame not too far from where it is now.
Apr 15, 2018: I installed the oil filter relocation kit and ditched the engine oil cooler around Jan 1. I ended up mounting the oil filter next to the massive ABS/brake manifold mess (not sure what this is called) on the inside of the LF inner fender. It is on the front portion of the inner fender for now until I finaly do the ABS delete. When I first instaled it I noticed that my fuel pump was continuing to run for a long time after I shut off the engine. Like 30 seconds. I thought "what have I done now?". Spent some time looking at this but didn't see any issues. Then I started having a dead battery every time I would park it for more than a few hours. I thought it might be related to the fuel pump running after the key was off (was something else also powered?). I had also cleaned up some of the wiring under the hood, adding new wire loom, re-routed the wires going to the alternator, etc at the same time I did the oil filter relocate. I spent some time looking at that but it all seemed fine. Finally I took my battery in and had it tested and it was bad. Got a replacement from Interstate and it has been fine since.
It seems that 95% of my oil leaks are gone since tightening the PS hoses going in to the steering box and doing the engine oil cooler/oil filter relocation. Still not leak free but much, much better. Now I need to do a thorough cleaning of the undercarriage & engine bay and fix whatever is still leaking.
Oct 2, 2018: The Yukon has been down for a while. I finally got it to pass emissions in about May after failing about 5 times. The problem turned out to be that the ' timing was advanced quite a bit. I had advanced it a long time ago because it seemed to run better. Not long after I got the emissions clean I decided to make another atempt at fixing the busted up, terrible looking, dash. This is by far rhe worst loking thing on the truck. I pulled out the entire dash and built a supporting structure around it to hold it solid and started adding bondo to replace the missing pieces and fill in the many cracks. Since the entire top was missing (due to an underdash fire with the previous owner I think) I bought a piece of 1/4" plywood and made a template to fill in the missing top piece.
While I had the the dash was out I took the opportunity to clean up some of wiring mess under the dash. Somehow I must have created a short. I was driving down the freeway about 70 MPH when smoke came from under my dash. I was able to make it home but it was a very stressful drive. I satrted going through the wiring rats nest but stil do not see any burnt wires. Right now I can start the truck up but after about a minute or two it starts running really bad and then dies. Looking under the dash at the wiring mess I see a connector with (I think) 3 wires. One of the wires is brown with black strip which I believe is the same as the timing wire that you disconnect to set the base timing. I didn't see where it is supposed to be connected to. If that is that wire then it kind of makes sense that that could be the issue. I saw online that with these same symptoms that it could be the ICM (Ignition Control Module) which also makes sense.

|
No dash and wiring mess
Took another look and now I see where the smoke came from. I had the gauge cluster just sitting on top of the steering wheel since the dash was out. The trace here must have gotten grounded.
|
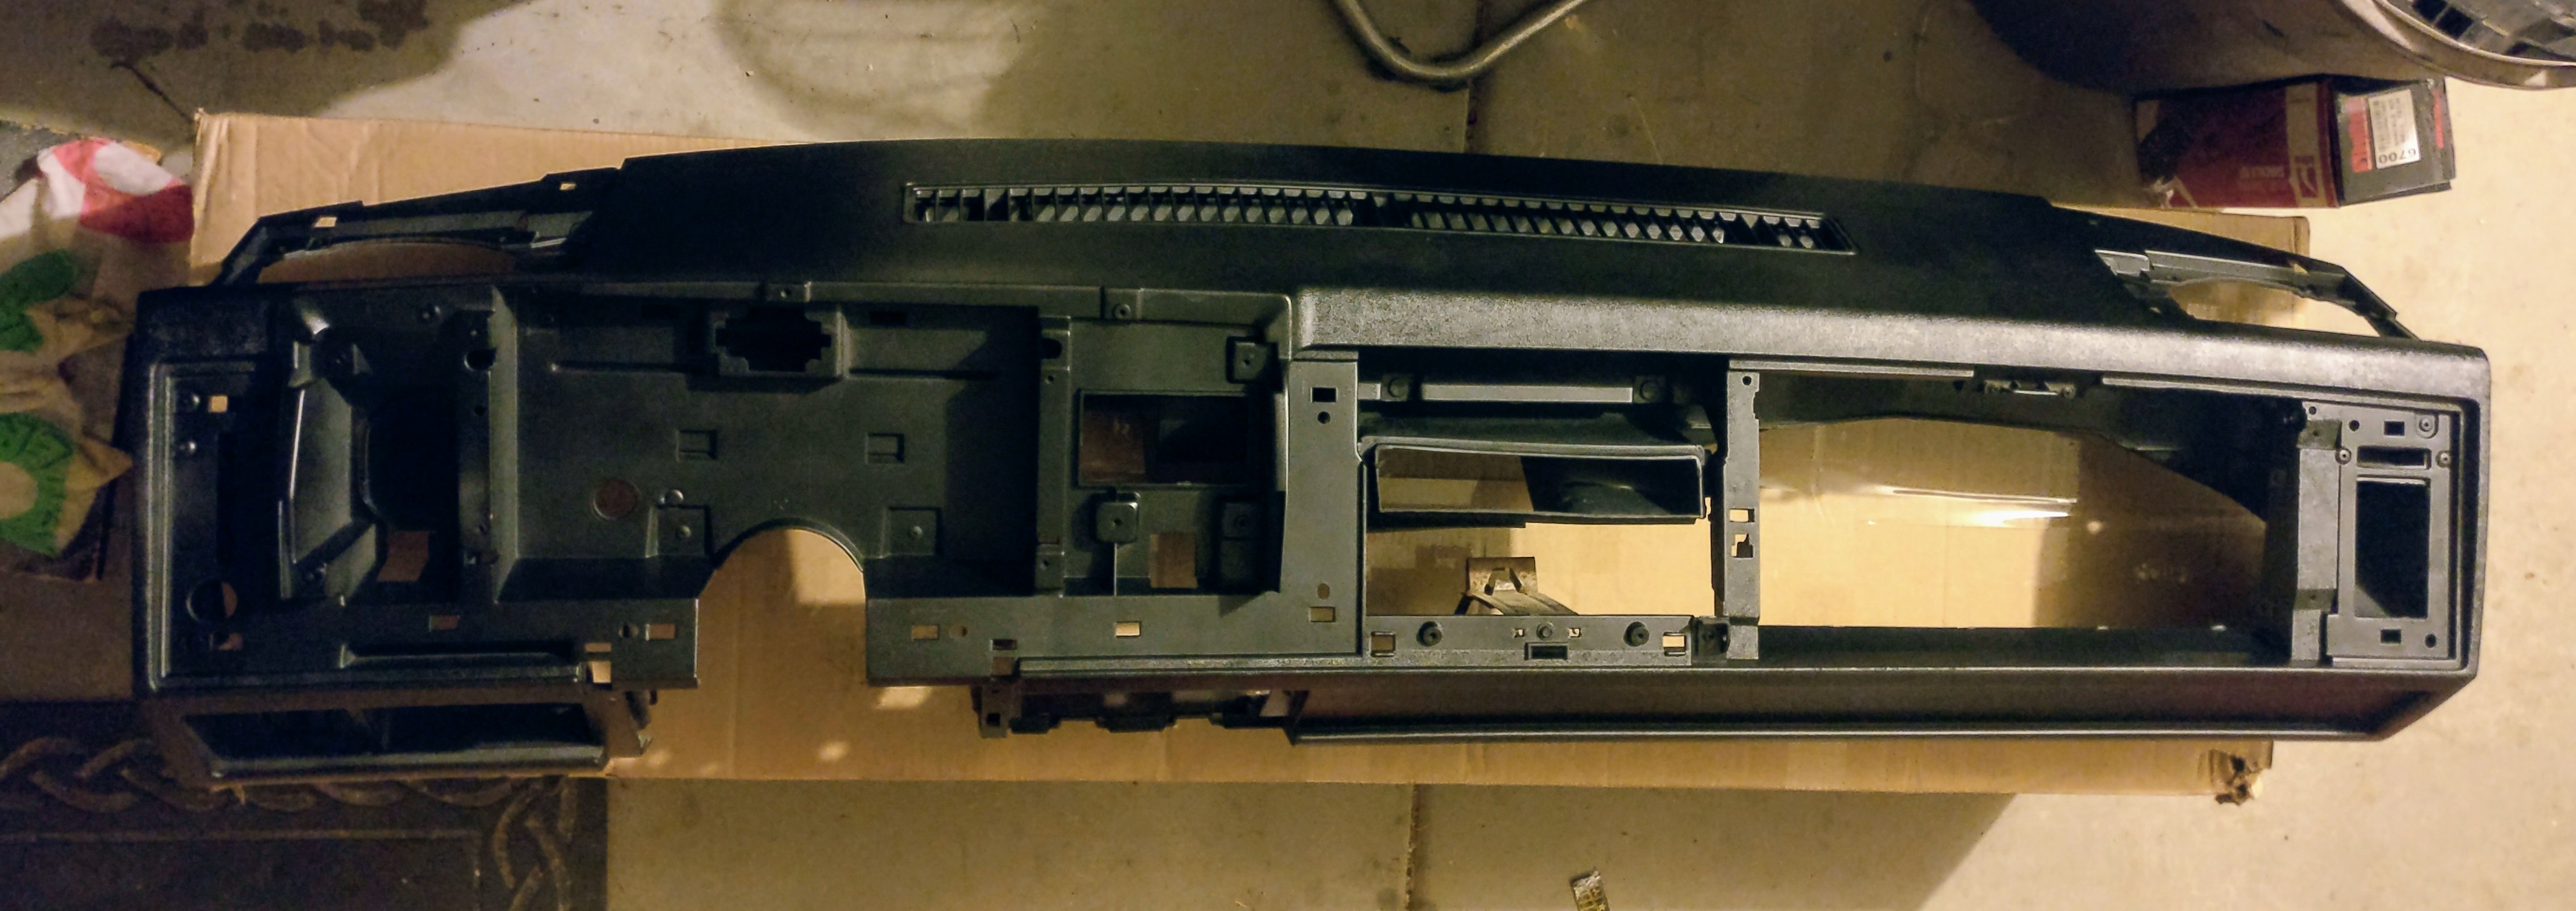
New dash core
In the middle of doing all of this I finally found a dash core on Ebay in almost perfect condition for $300 + $60 shipping. The dash was gray but I picked up some Duplicolor flat black interior paint from O'Reilly's and now it is black. Just need to clean up wiring and get it running and put the new dash in.
|
New dash core
Some Misc To Do Items:
Documenting some stuff here so I don't forget
Last updated Jan 10, 2021
Questions or Comments? Email Me!